
How to Connect a New Channel / OTA
Channel Manager allows you to easily connect a new booking channel at any time.
Before you begin, please note that the booking channel you wish to connect may require pricing set either including commission (Sell Rate) or excluding commission (Net Rate).
For clarification, you can contact the channel’s area manager for assistance with this information.
Connect a New Channel / OTA
The Channel Manager allows you to request a new channel/OTA by following these steps:
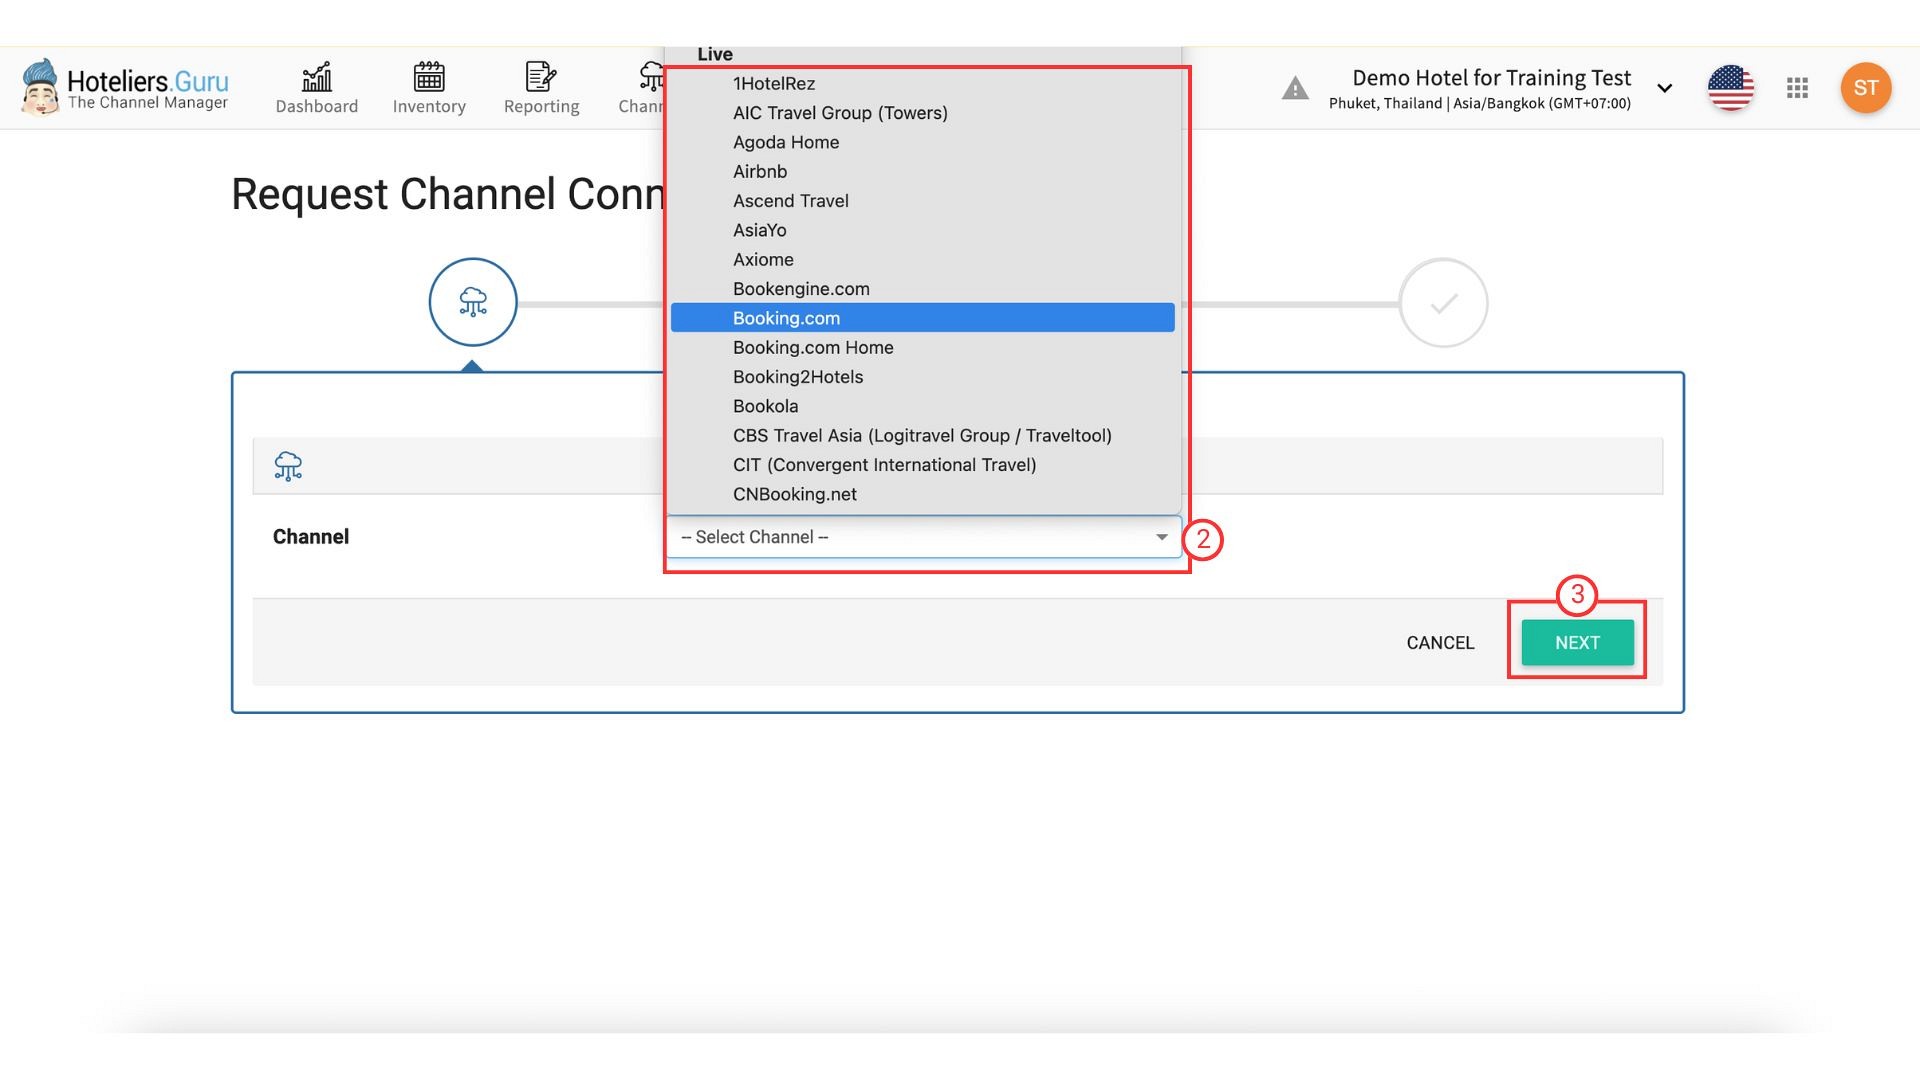
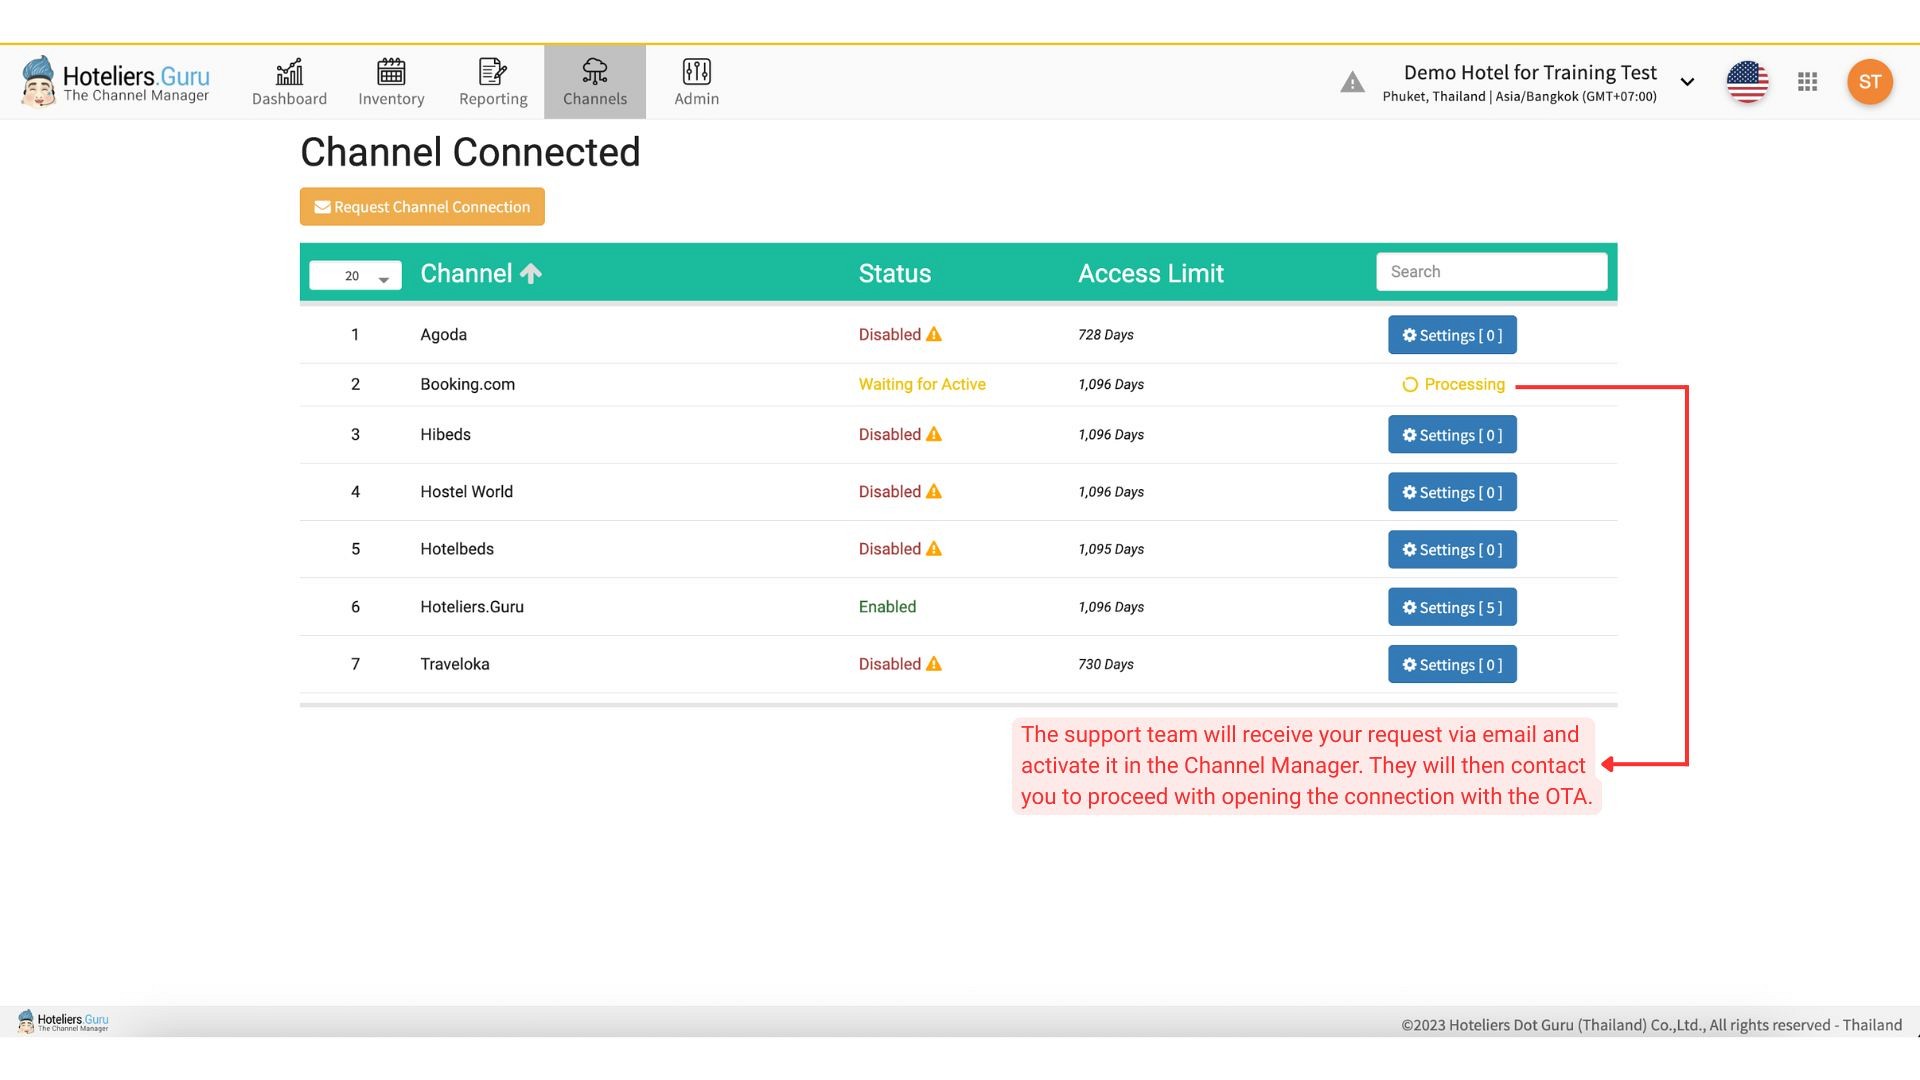
- Go to the Channels menu and click Request Channel Connection.
- Select the channel you want to connect from the dropdown list.
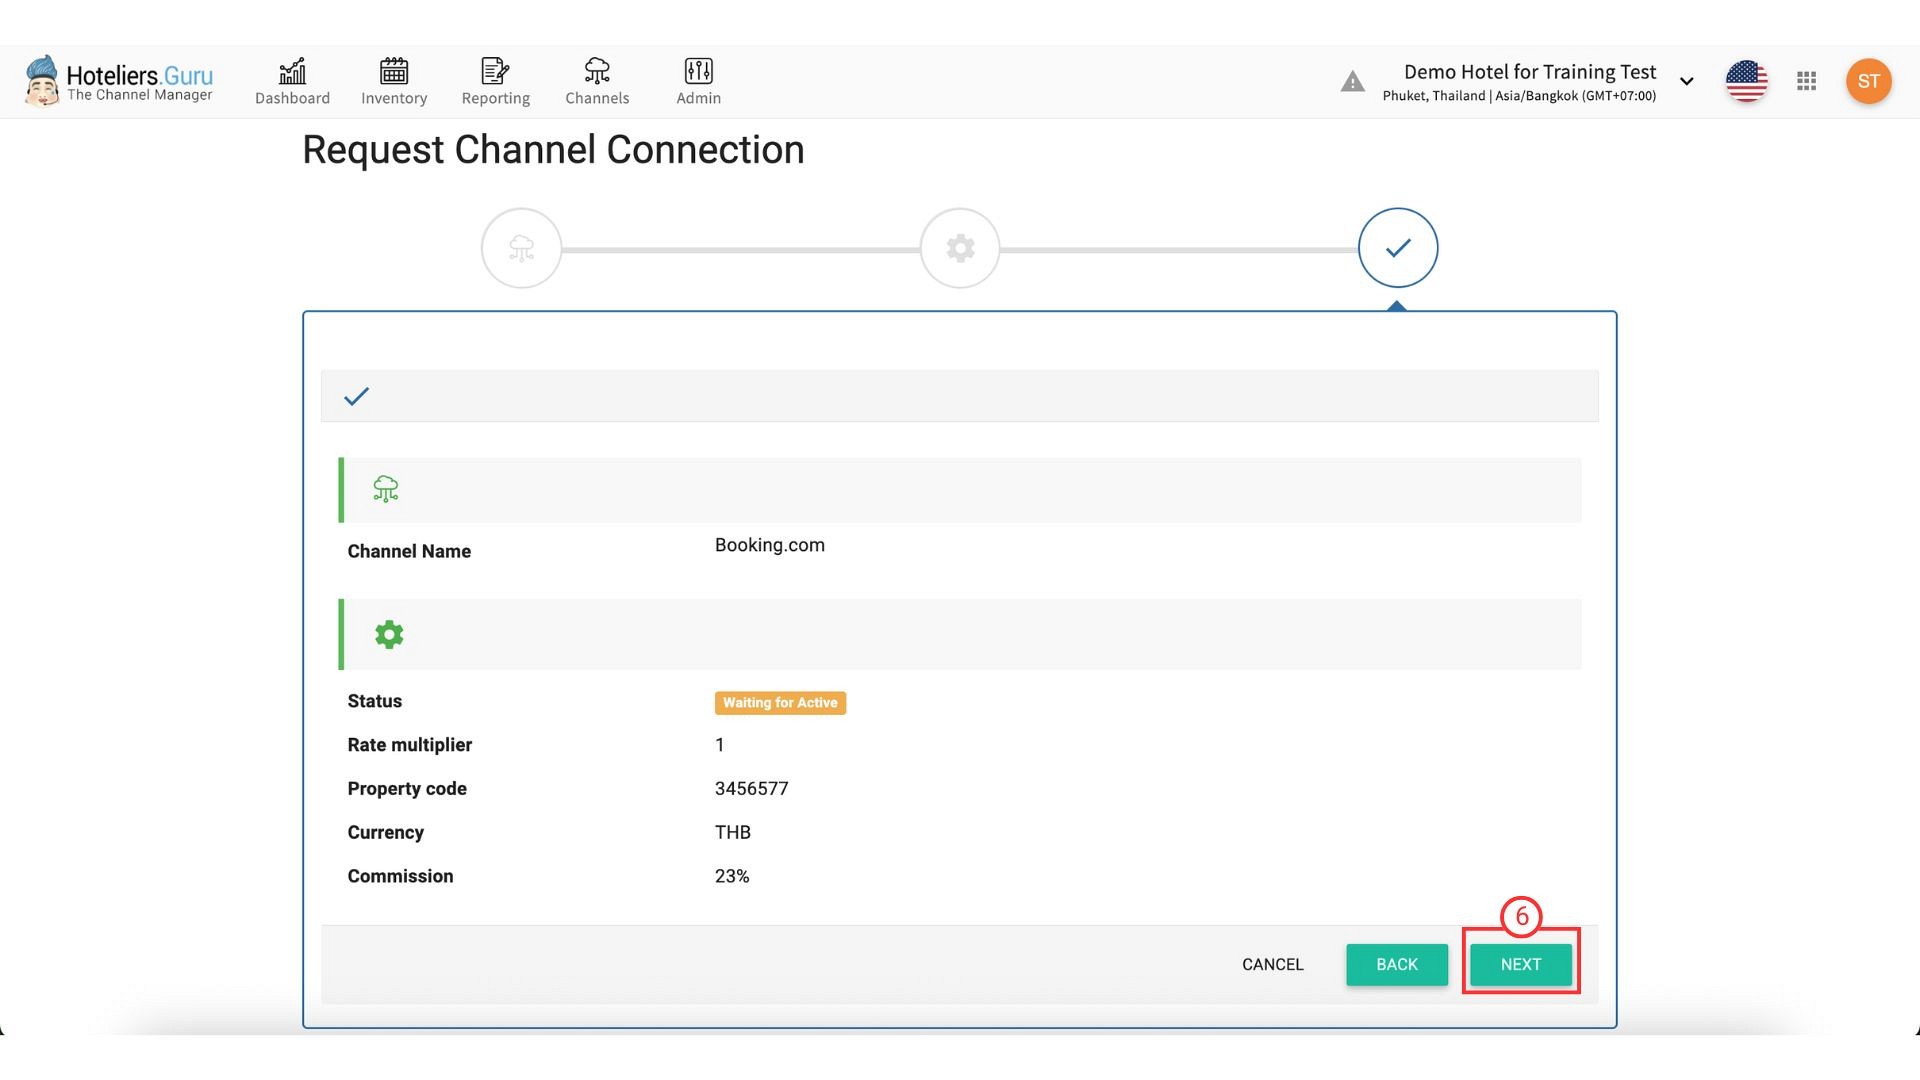
- Click Next.
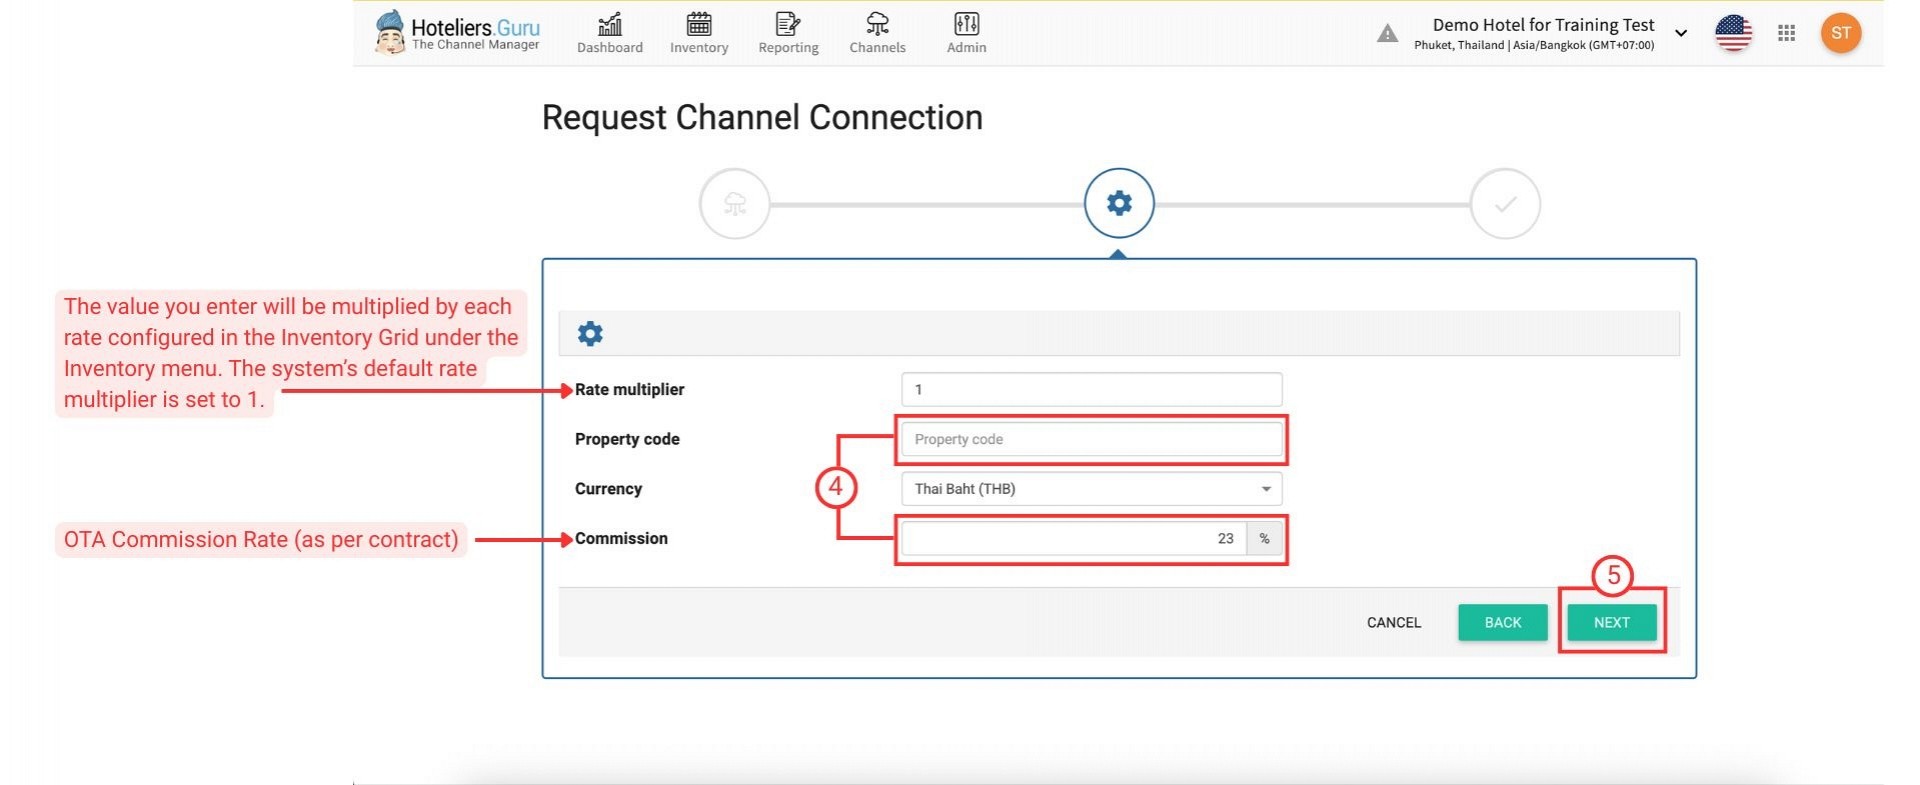
- Fill in the required details such as Property Code and Commission.
- Property code: Entering your property code which is belongs to a OTA.
- Commission: Entering OTA commission rate (as per contract).
- Rate Multiplier is a value that will be multiplied by each rate configured in the Inventory Grid under the Inventory menu.
- For Booking Channels that Support Selling Rate
- Example 1:
The system’s default Rate Multiplier is 1.
Rate Multiplier × Bar Rate = Price on the booking channel
→ 1 × $100 (from Inventory) = $100 (Selling Rate) - Example 2:
If you want to increase the price:
Enter a Rate Multiplier = 1.2
→ 1.2 x $100 (from Inventory) will be sent as $120 to the channel
- Example 1:
- For Booking Channels that Support Net Rate
If you want to send a Net Rate to the channel, you need to consider the commission fee and enter a value less than 1.
Example:
If the commission is 20% of the Selling Rate
→ Set Rate Multiplier = 0.8
→ $100 (Selling Rate) will be sent as $80 (Net Rate)
- For Booking Channels that Support Selling Rate
- Rate Multiplier is a value that will be multiplied by each rate configured in the Inventory Grid under the Inventory menu.
- Click Next.
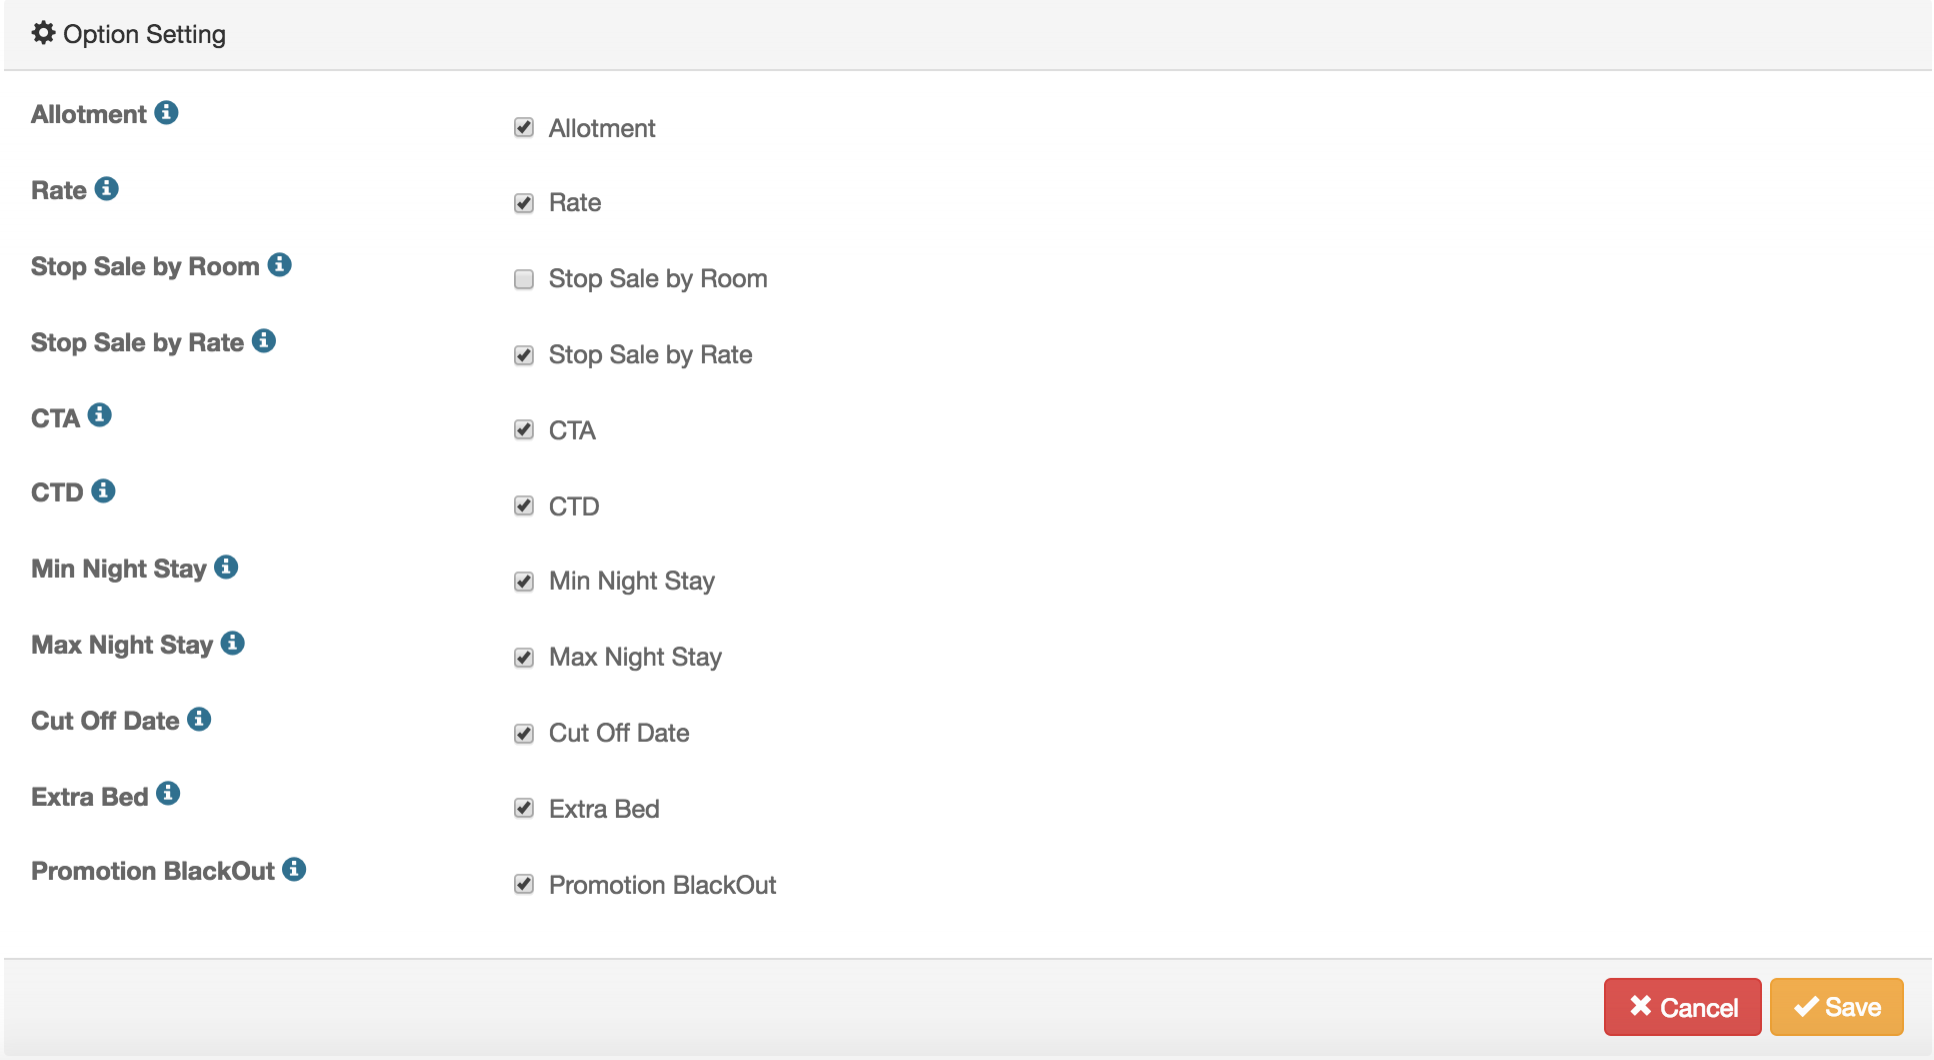
- Select the desired restrictions for this channel. (Available restrictions may vary depending on the channel’s supported features.) Then click Next.
- Your request will be displayed with the status “Waiting for Activation.”
The support team will receive your request via email and activate it in the Channel Manager. They will then contact you to proceed with opening the connection with the OTA.

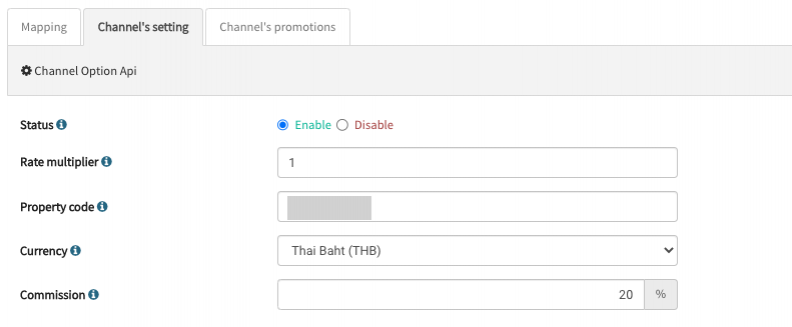
Editing an Existing Channel
1) Go to the menu Channel and click Settings on a desired channel.
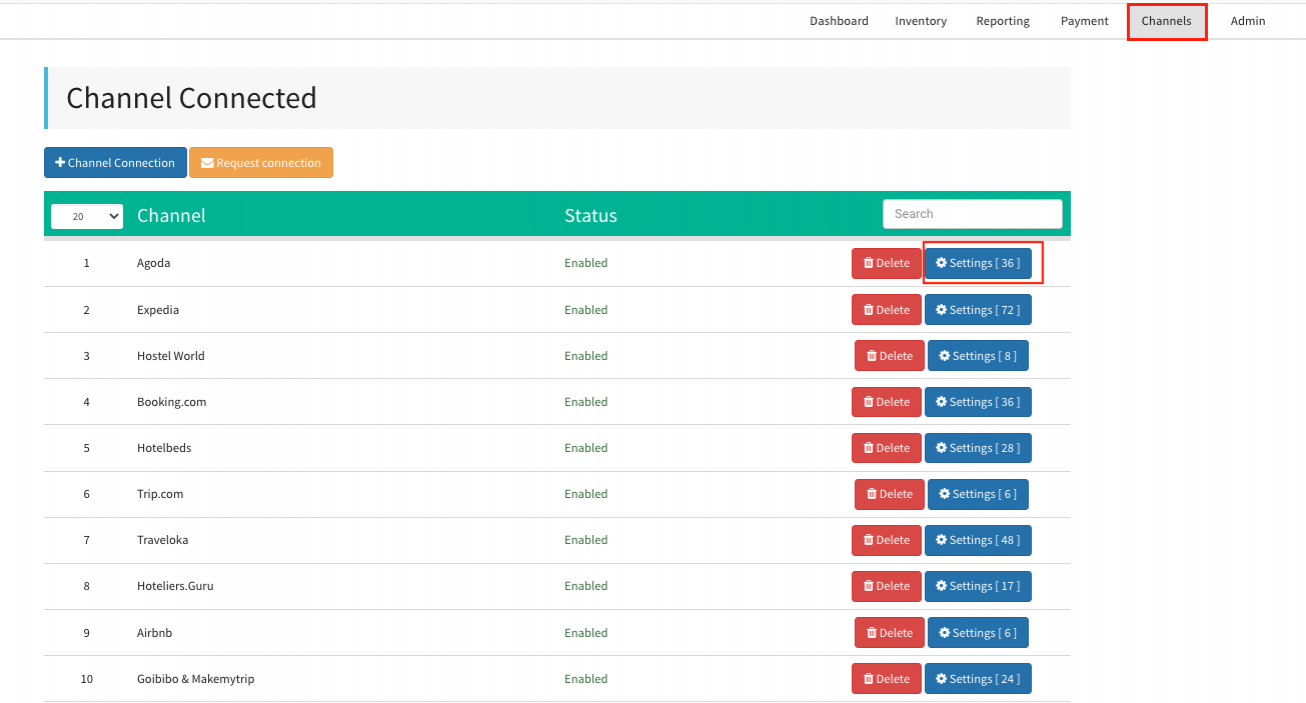
2) Edit the details of settings wherever you want and Save.
|
|
|
|