Updating by Bulk
Bulk Update
Bulk Update is a perfect way to manage your room availability, pricing and restrictions for multiple periods with a click of a button. The calendar view in bulk update displays the dates from the current month until the next 3 years. (approx. 1,098 days)
For example: you could update a room rate's availability in low season 2017, 2018 and 2019 or even specific date at the same time by using our professional calendar view management.
- Accessing the Bulk Update
- Selecting Multiple Periods For An Update in Calendar View
- Availability Update
- Open Sales / Close Sales
- Pricing Update
- Restriction Update
1) From the menu bar, click Inventory. 2) Click + Bulk button on the top of Room Rate.
Selecting Multiple Periods For An Update in Calendar View
In the our Bulk Update tool is the best way to manage every actions of your updates.
For example: You would like to update no. of room available during 1 - 9 May 2015 which you are fully booked.
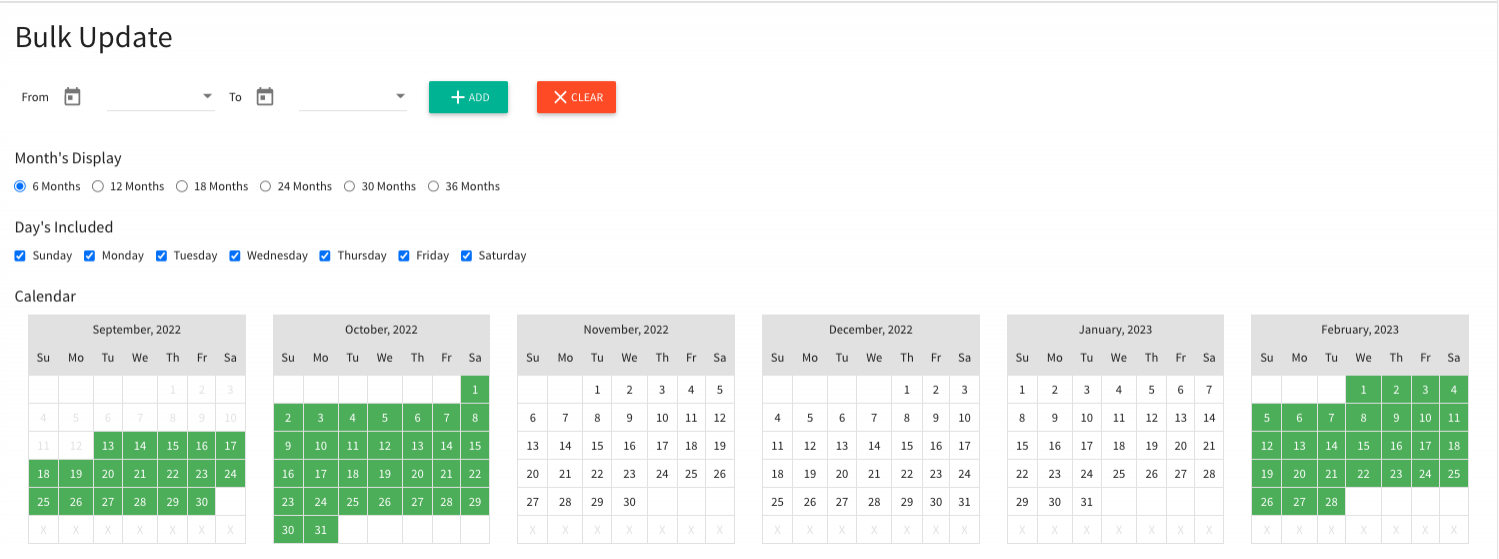
1) In the Bulk Update page, locate the date from Date Range or by selecting on its date in Calendar view. You have 2 optional ways to select dates as follows:
1.1) Select from Date Range.
- Identify the starting date in Start Date field.
- Identify the ending date in End Date field.
- Choose your calendar view by selecting an option which is option and divided into 6 Months, 12 Months, 18 Months, 24 Months and 36 Months.
- Choose the Day of Week to include in Calendar View which you can select from Sunday, Monday, Tuesday, Wednesday, Thursday, Friday, Saturday.
1.2) Select from Calendar View.
- Just click on the dates you wish to update. The selected date appears Green color.
- Please note that Today Date appears Blue color.
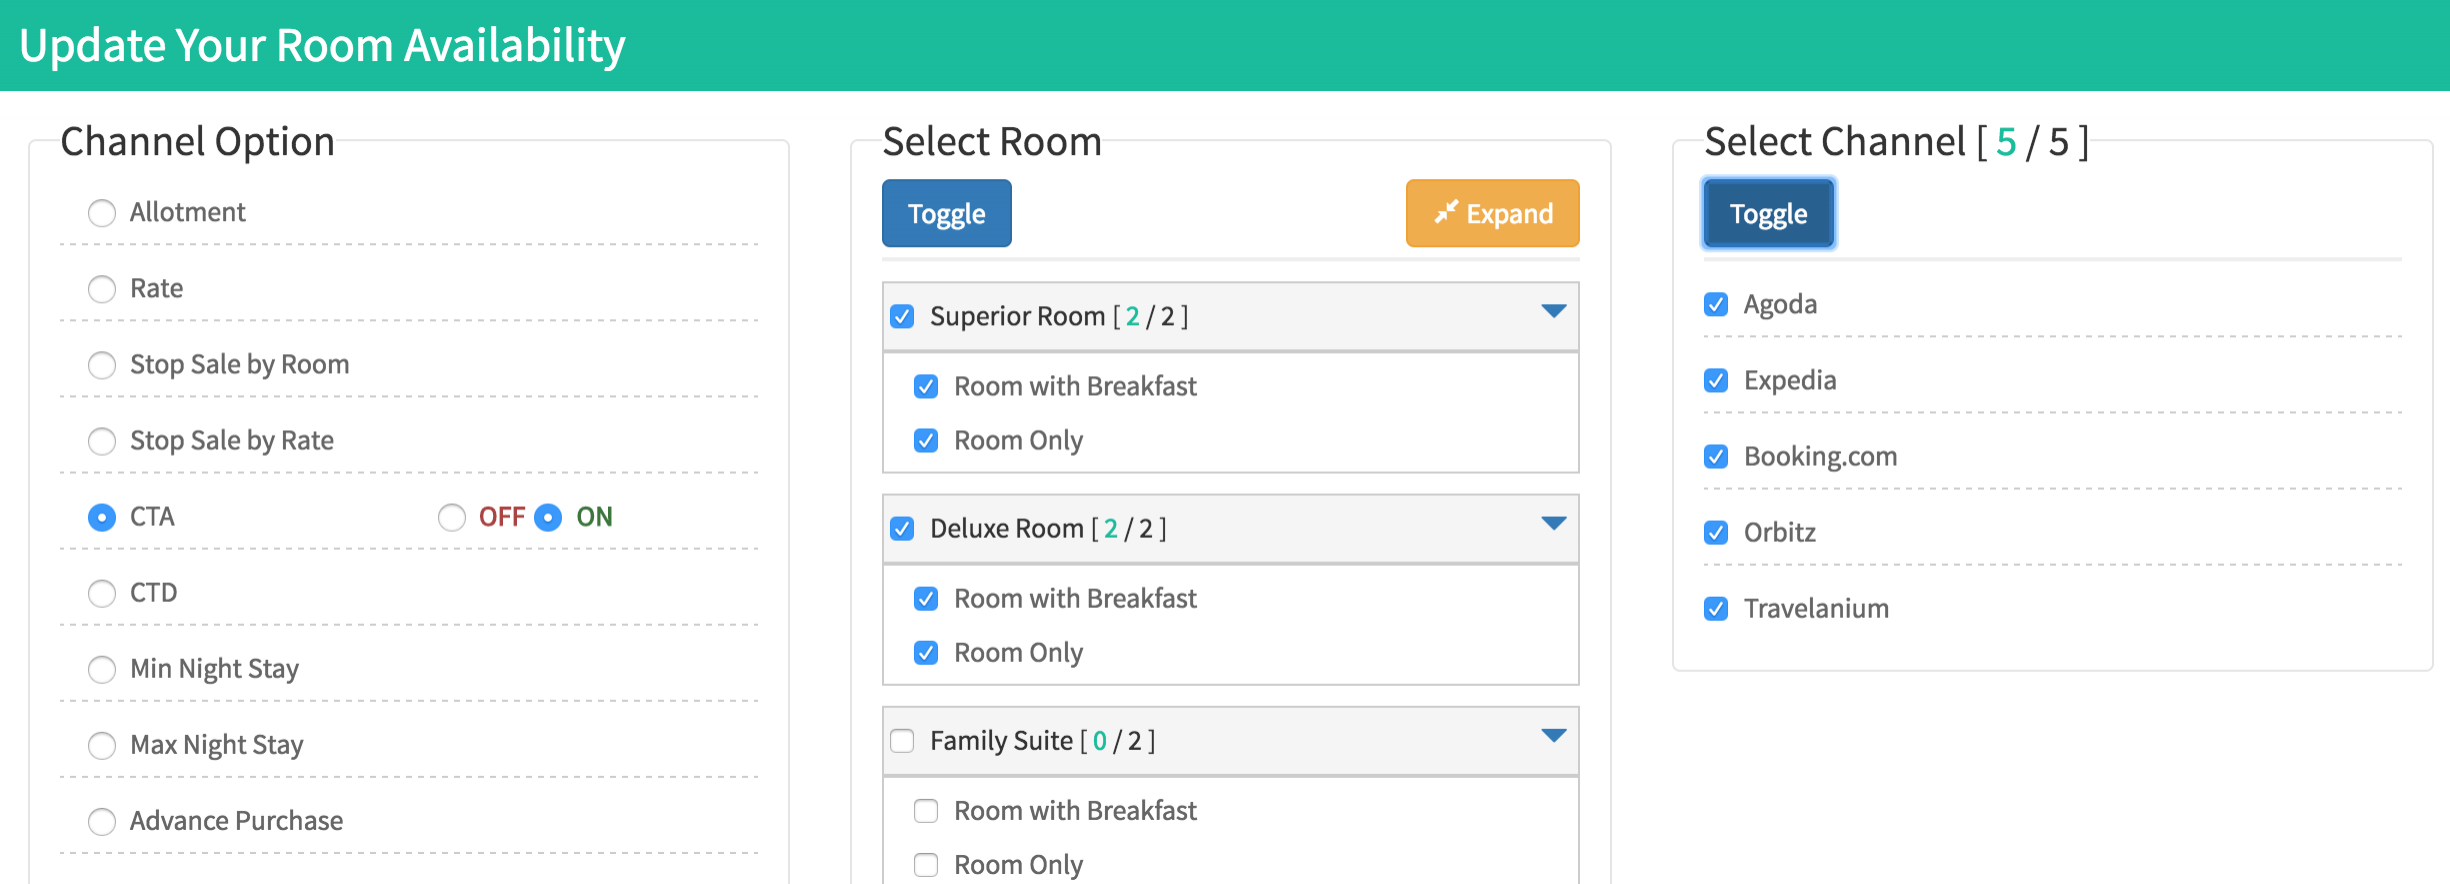
Below the Calendar View in Bulk Update page. There is a list of Update Option below on the left column.
1) Locate the date in Calendar View.
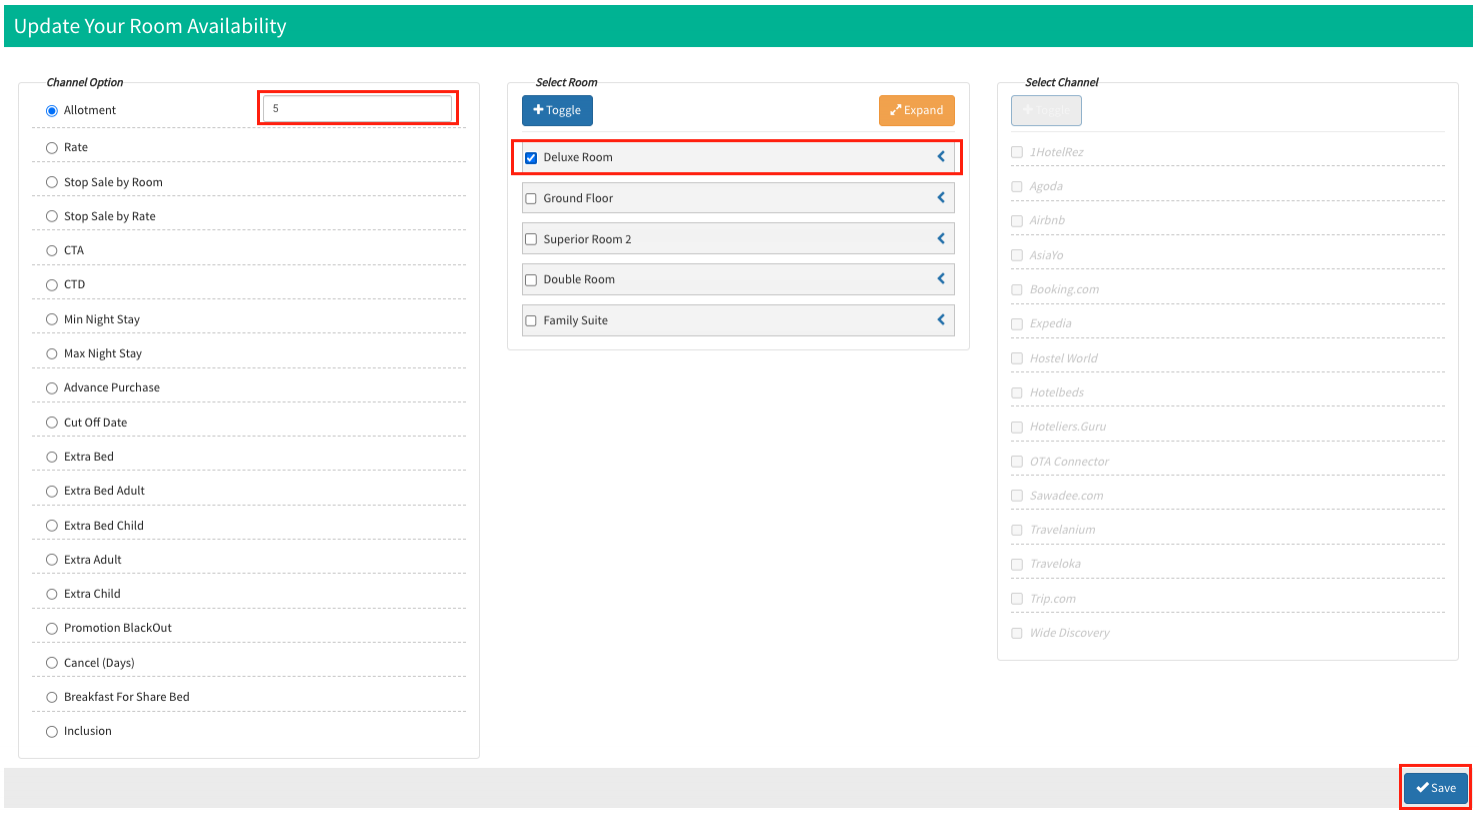
2) Choose Allotment and fill the number of available room in its field.
3) On the middle column, Select the desired room type you wish to apply.
Note: You cannot apply number of room available to any of room rate and you don’t need to select any booking site to update the no. of available room because the number of available room is set at room type level and they're shared in Calendar table for all connected booking channels.
4) Click Save to apply changes without removing the periods in Calendar View and continue to update the others options.
Below the Calendar View in Bulk Update page. There is a list of Update Option below on the left column.
1) Locate the date in Calendar View.
2) Choose an update option for Stop Sale by Room or Stop Sale by Rate to apply an action you wish to. (Eg. Open sales or Close sales)
| Stop Sale by Room |
|
| Stop Sale by Rate |
|
3) Click Save to apply changes without removing the periods in Calendar View and continue to update the others options.
Below the Calendar View in Bulk Update page. There is a list of Update Option below on the left column.
1) Locate the date in Calendar View.
2) Choose Rate and fill the value of room pricing in its field.
3) On the middle column, Select the desired room rate you wish to apply. You can select it individually at room rate level to apply different room rates.
4) On the right column, Mark ✓ in the checkbook where you wish to apply room rates to......
| Derive Rate |
To apply room rates to Derive rate / Calendar table.
Note: Only room rates which are mapped to Master Rate will be applied changes. |
| Manually Rate |
To apply room rates to Individual Booking Channel which is selected.
Note: Only room rates which are mapped to Manually Rate will be applied changes. |
5) Click Save to apply changes without removing the periods in Calendar View and continue to update the others options.
The Restriction are a special conditions which can be applied from channel to some of booking channels which are supported. This is according to the XML connectivity rules which is defined by each booking channels. They are listed on the left column which you can use to send the updates to the supported booking channels.
1) Locate the date in Calendar View.
2) Choose one of the desired restriction you wish to apply.
|
A room inventory control function that prevents reservations from arriving on check-in date. Reservations can stay through the date. Select ON to enable or OFF to disable. |
|
A room inventory control function that prevents reservations from departing on departure date. Reservations can stay through the date. Select ON to enable or OFF to disable. |
|
A minimum number of nights a guest must stay if requested during staying period. Put the desired value in its field. |
|
A maximum number of nights a guest must stay if requested during staying period. Put the desired value in its field. |
|
An exact number of nights a guest must stay if requested during staying period. Put the desired value in its field. |
|
A minimum number of nights a guest must stay if requested on the check-in date. Put the desired value in its field. |
|
A maximum number of nights a guest must stay if requested on the check-in date. Put the desired value in its field. |
|
An exact number of nights that a must stay if requested on check-in date. Put the desired value in its field. |
|
A minimum number of days a guest must book in advance prior to check-in date. Put the desired value in its field. |
|
A number of days a room should be reserved prior to check-in date. Put the desired value in its field. |
|
Pricing for an extra bed / an adult. Put the desired value in its field. |
|
Pricing for an extra bed / a child. Put the desired value in its field. |
|
Pricing for an extra adult. Put the desired value in its field. |
|
Pricing for an extra child. Put the desired value in its field. |
|
To Enable or Disable a promotion. Select ON to enable OR OFF to disable. |
3) On the middle column, choose the desired room rates to apply selected restriction.
4) A list of supported booking channels appear on the right column. Then, choose the desired booking channels.
5) Click Save to apply changes without removing the periods in Calendar View and continue to update the others options.


