

Step 1: Create a Cancellation Policy Template
This step allows you to create and manage cancellation policy templates before applying them to specific date ranges.
Procedure
- Go to Setting → Cancellation Policy.
- Under Step: 1 All Cancellation, click Add New.
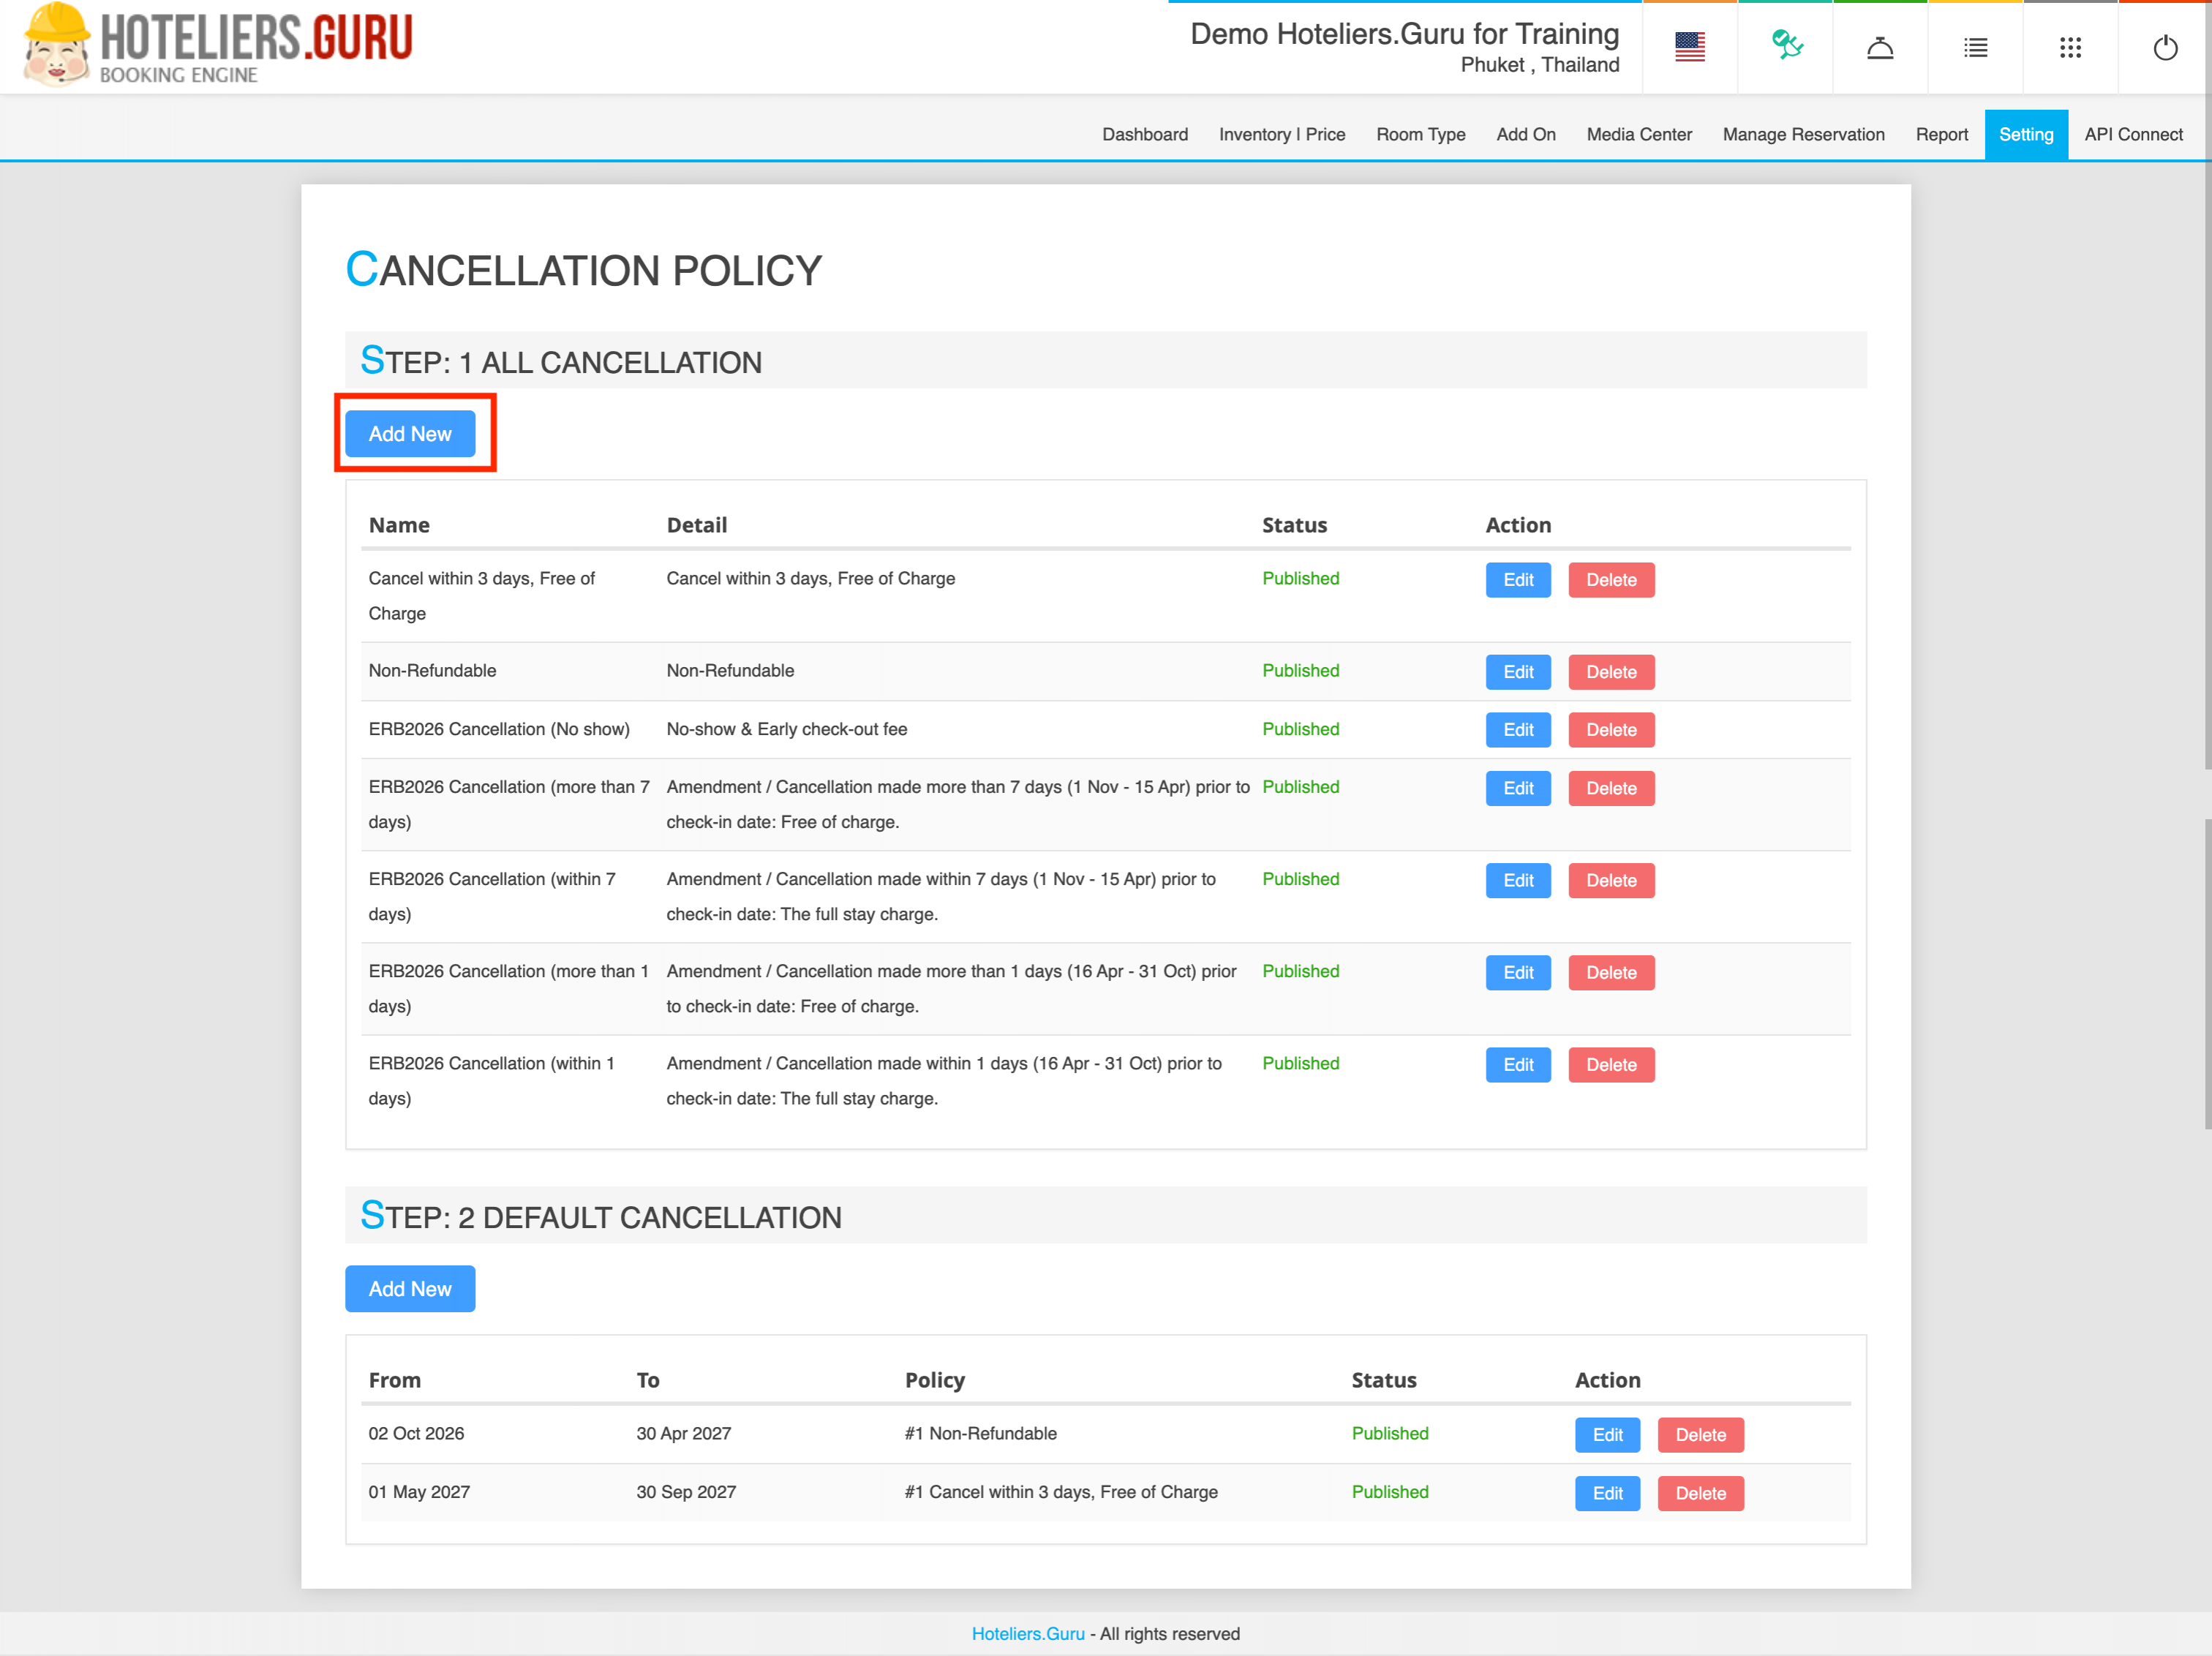
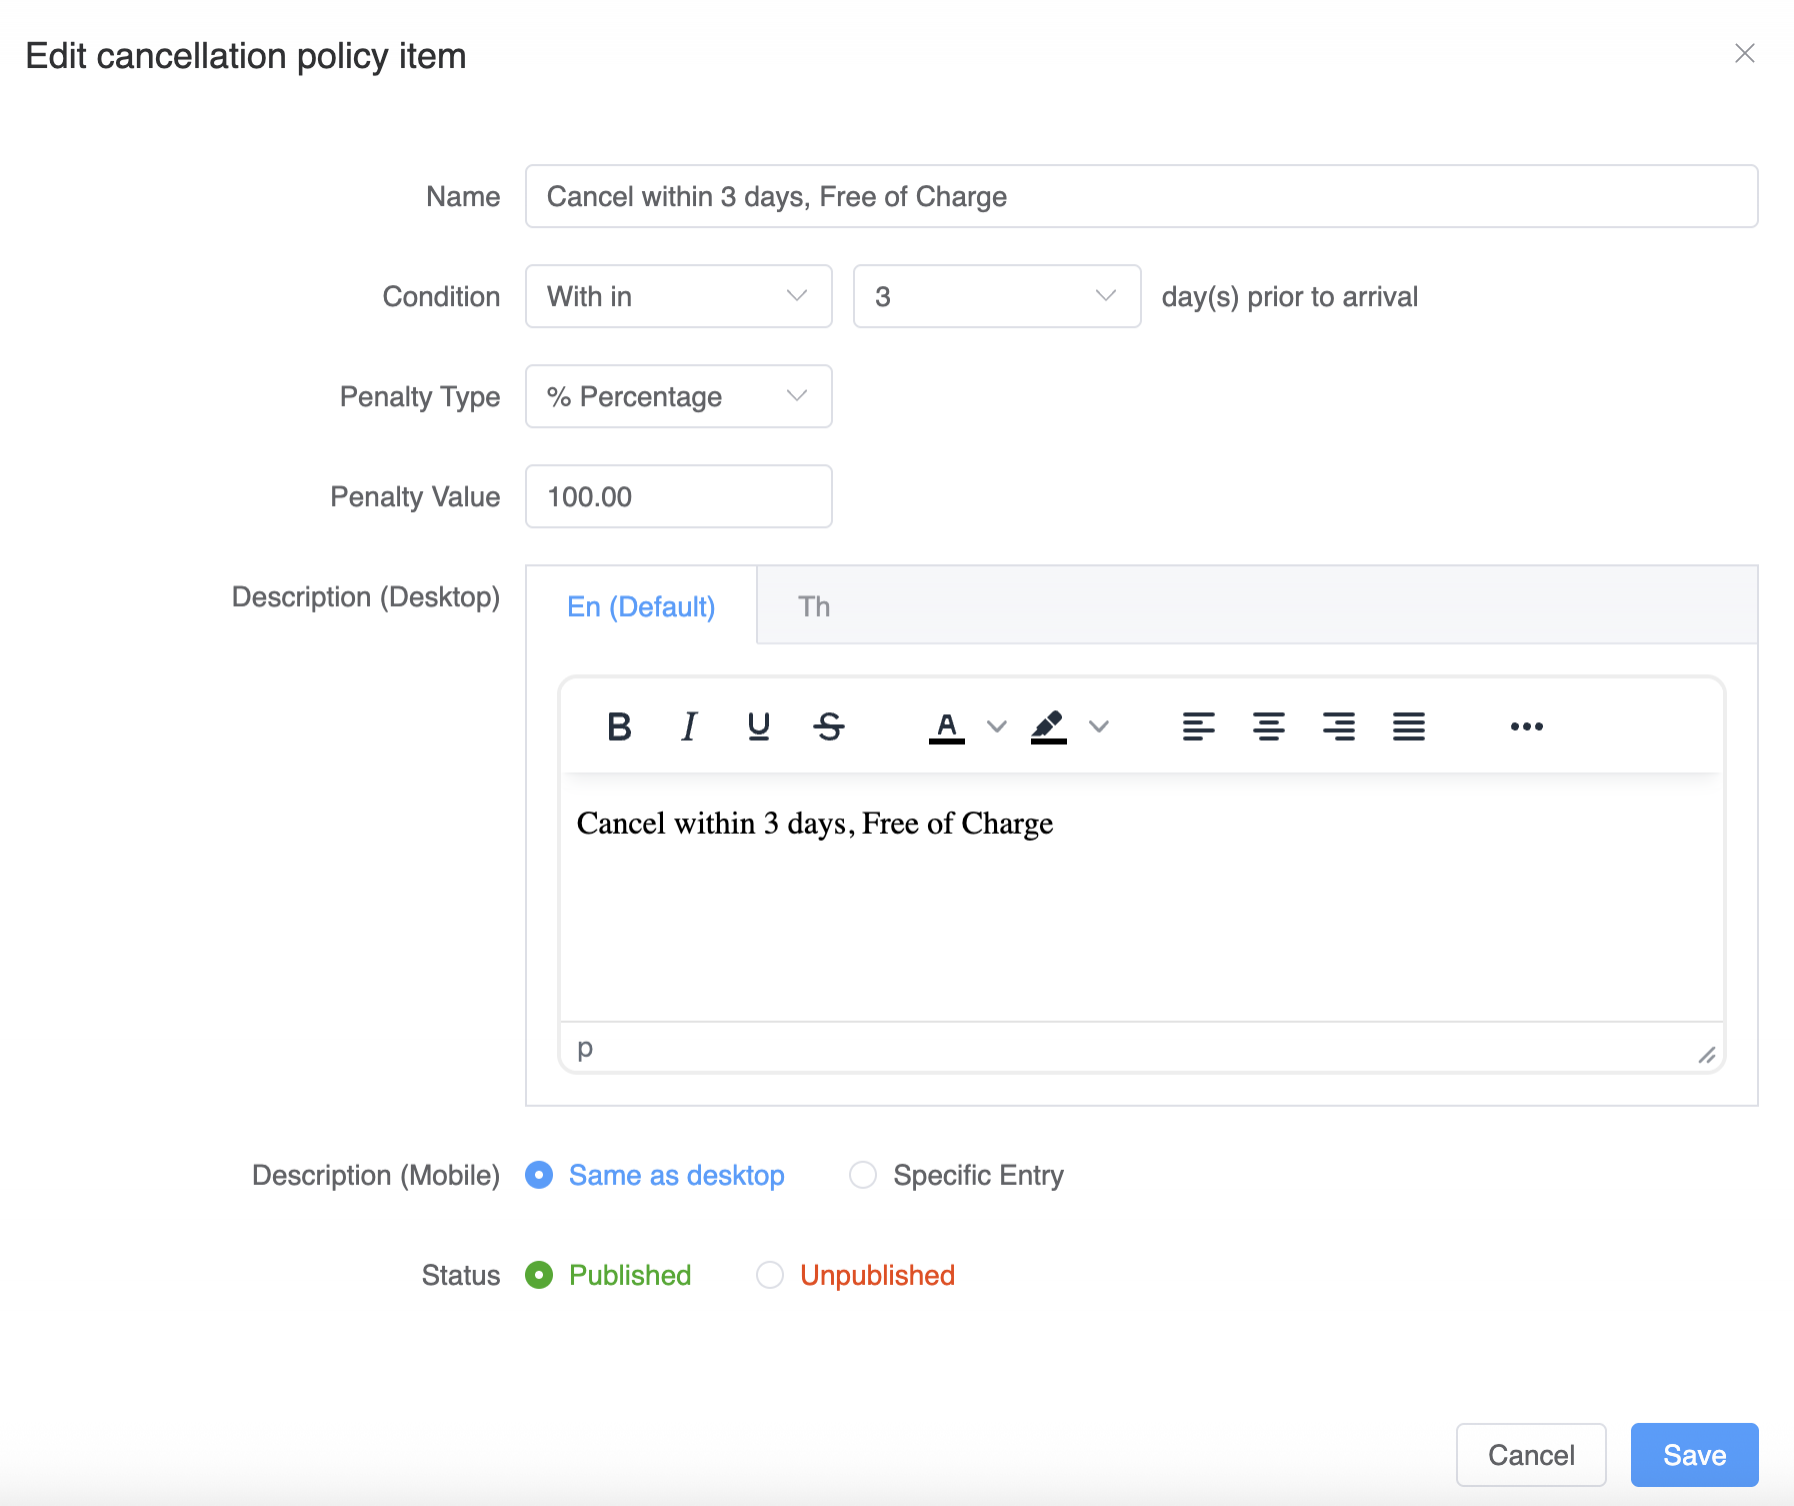
- Enter the cancellation policy details:
- Name: Enter a name for the cancellation policy.
- Detail: Enter the cancellation terms and conditions, including the cancellation deadline and applicable charges.
-
Save the policy and ensure that its status is Published before using it.
Examples of Cancellation Policy Templates
- Free Cancellation: Guests can cancel within the specified period without charge.
- Non-Refundable: The booking is non-refundable.
- Cancellation Within 7 Days: Cancellations made within 7 days before the check-in date are subject to the full stay charge.
Note: The policy name and details should clearly describe the cancellation terms to help avoid confusion when applying the policy in Step 2.
Step 2: Apply the Cancellation Policy
After creating the cancellation policy template in Step 1, you can assign it to a specific date range.
Procedure
-
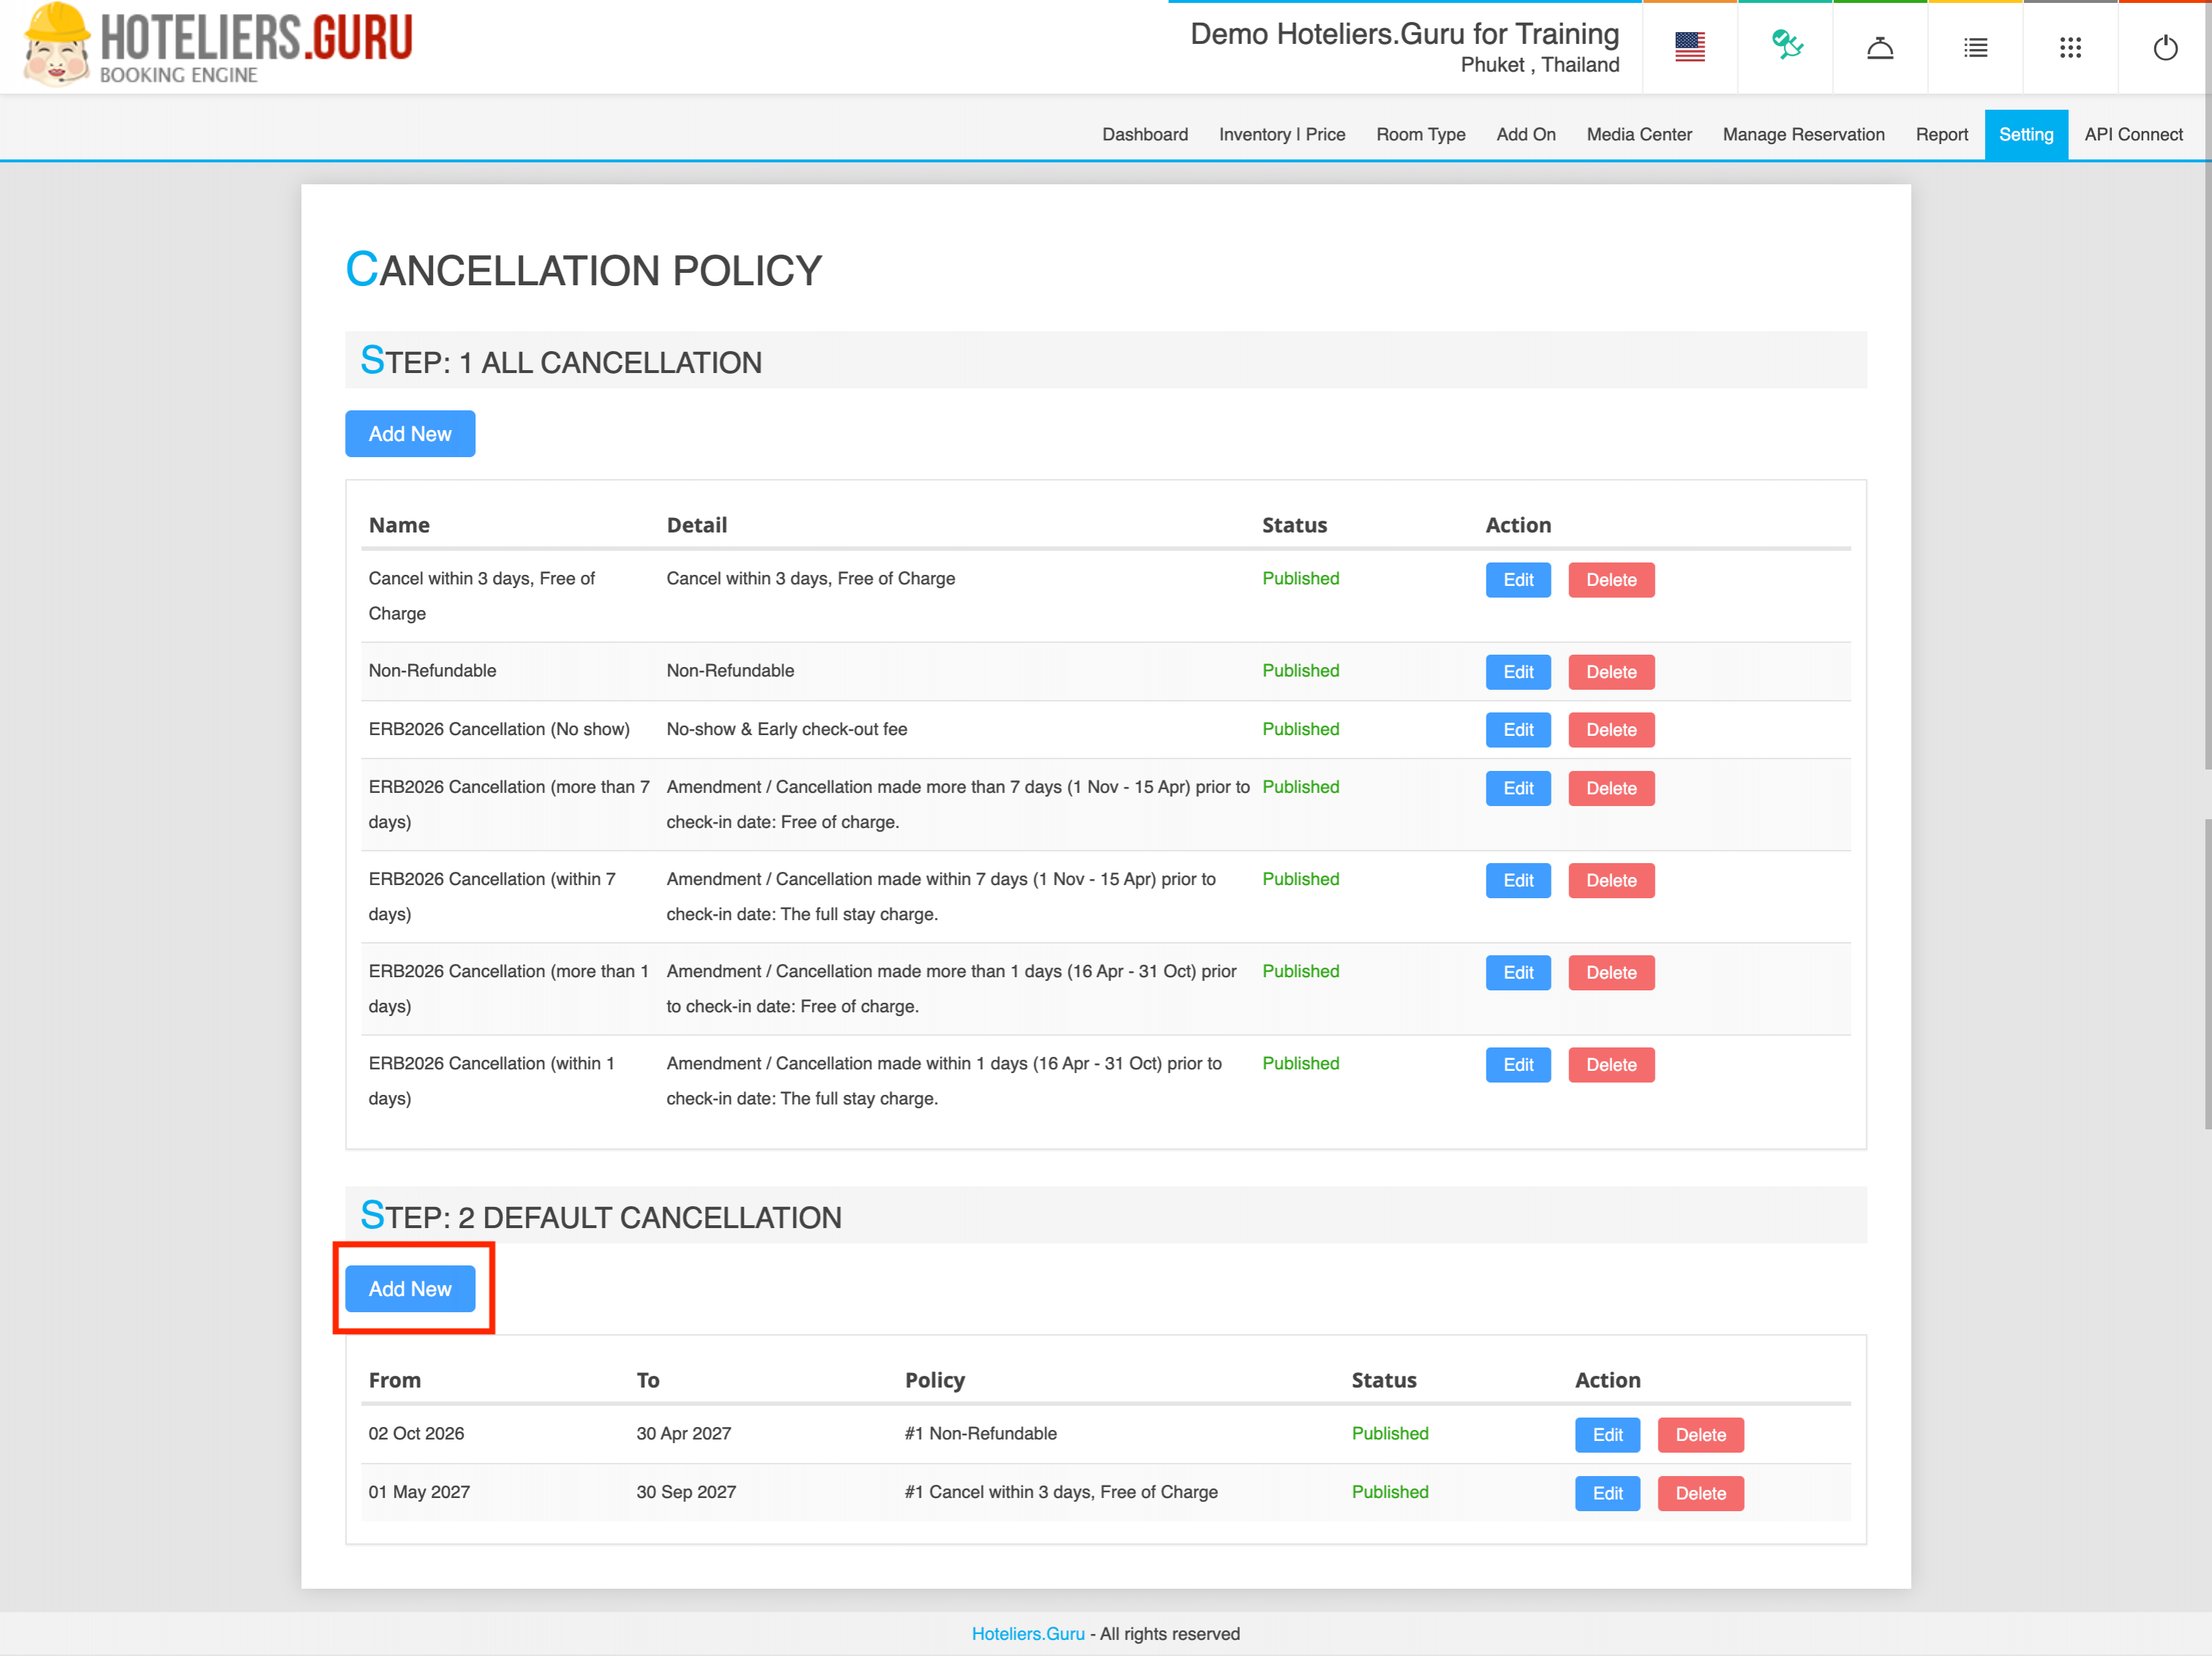
Under Step: 2 Default Cancellation, click Add New.
-
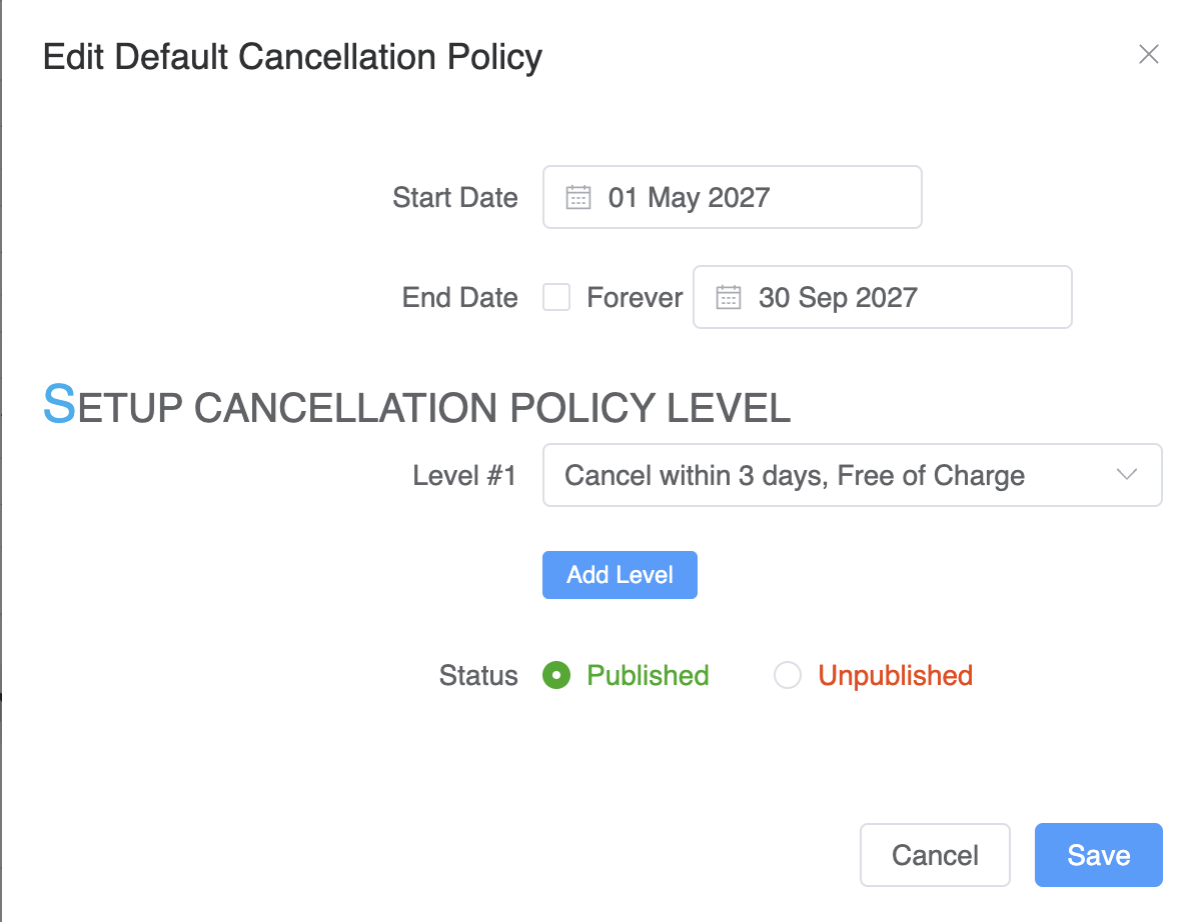
Specify the date range:
- From: Enter the start date when the policy becomes effective.
- To: Enter the end date when the policy remains effective.
-
Under Policy, select the cancellation policy template created in Step 1.
-
Save the configuration and ensure that the status is Published.
-
Review the configured date range and assigned policy to ensure that the settings are correct.
Example
| From | To | Policy |
|---|---|---|
| 02 Oct 2026 | 30 Apr 2027 | Non-Refundable |
| 01 May 2027 | 30 Sep 2027 | Cancel within 3 days, Free of Charge |
In this example, the Non-Refundable policy applies from 2 October 2026 to 30 April 2027, while the Free Cancellation policy applies from 1 May 2027 to 30 September 2027.
Important Notes
- Create the cancellation policy template in Step 1 before assigning it in Step 2.
- Ensure that the selected policy is Published.
- Check the effective dates carefully to ensure that the correct policy applies to the intended period.
- Review the configured policies to avoid unintended gaps or overlaps between date ranges.
Workflow: Create Cancellation Policy Template → Apply Policy to Date Range → Publish and Review