
How to create a new resevation
Intel Cloud PMS provides two ways to create a new reservation:
- By using the Create Reservation button: You can start the reservation process by clicking the “Create Reservation” button on the main dashboard.
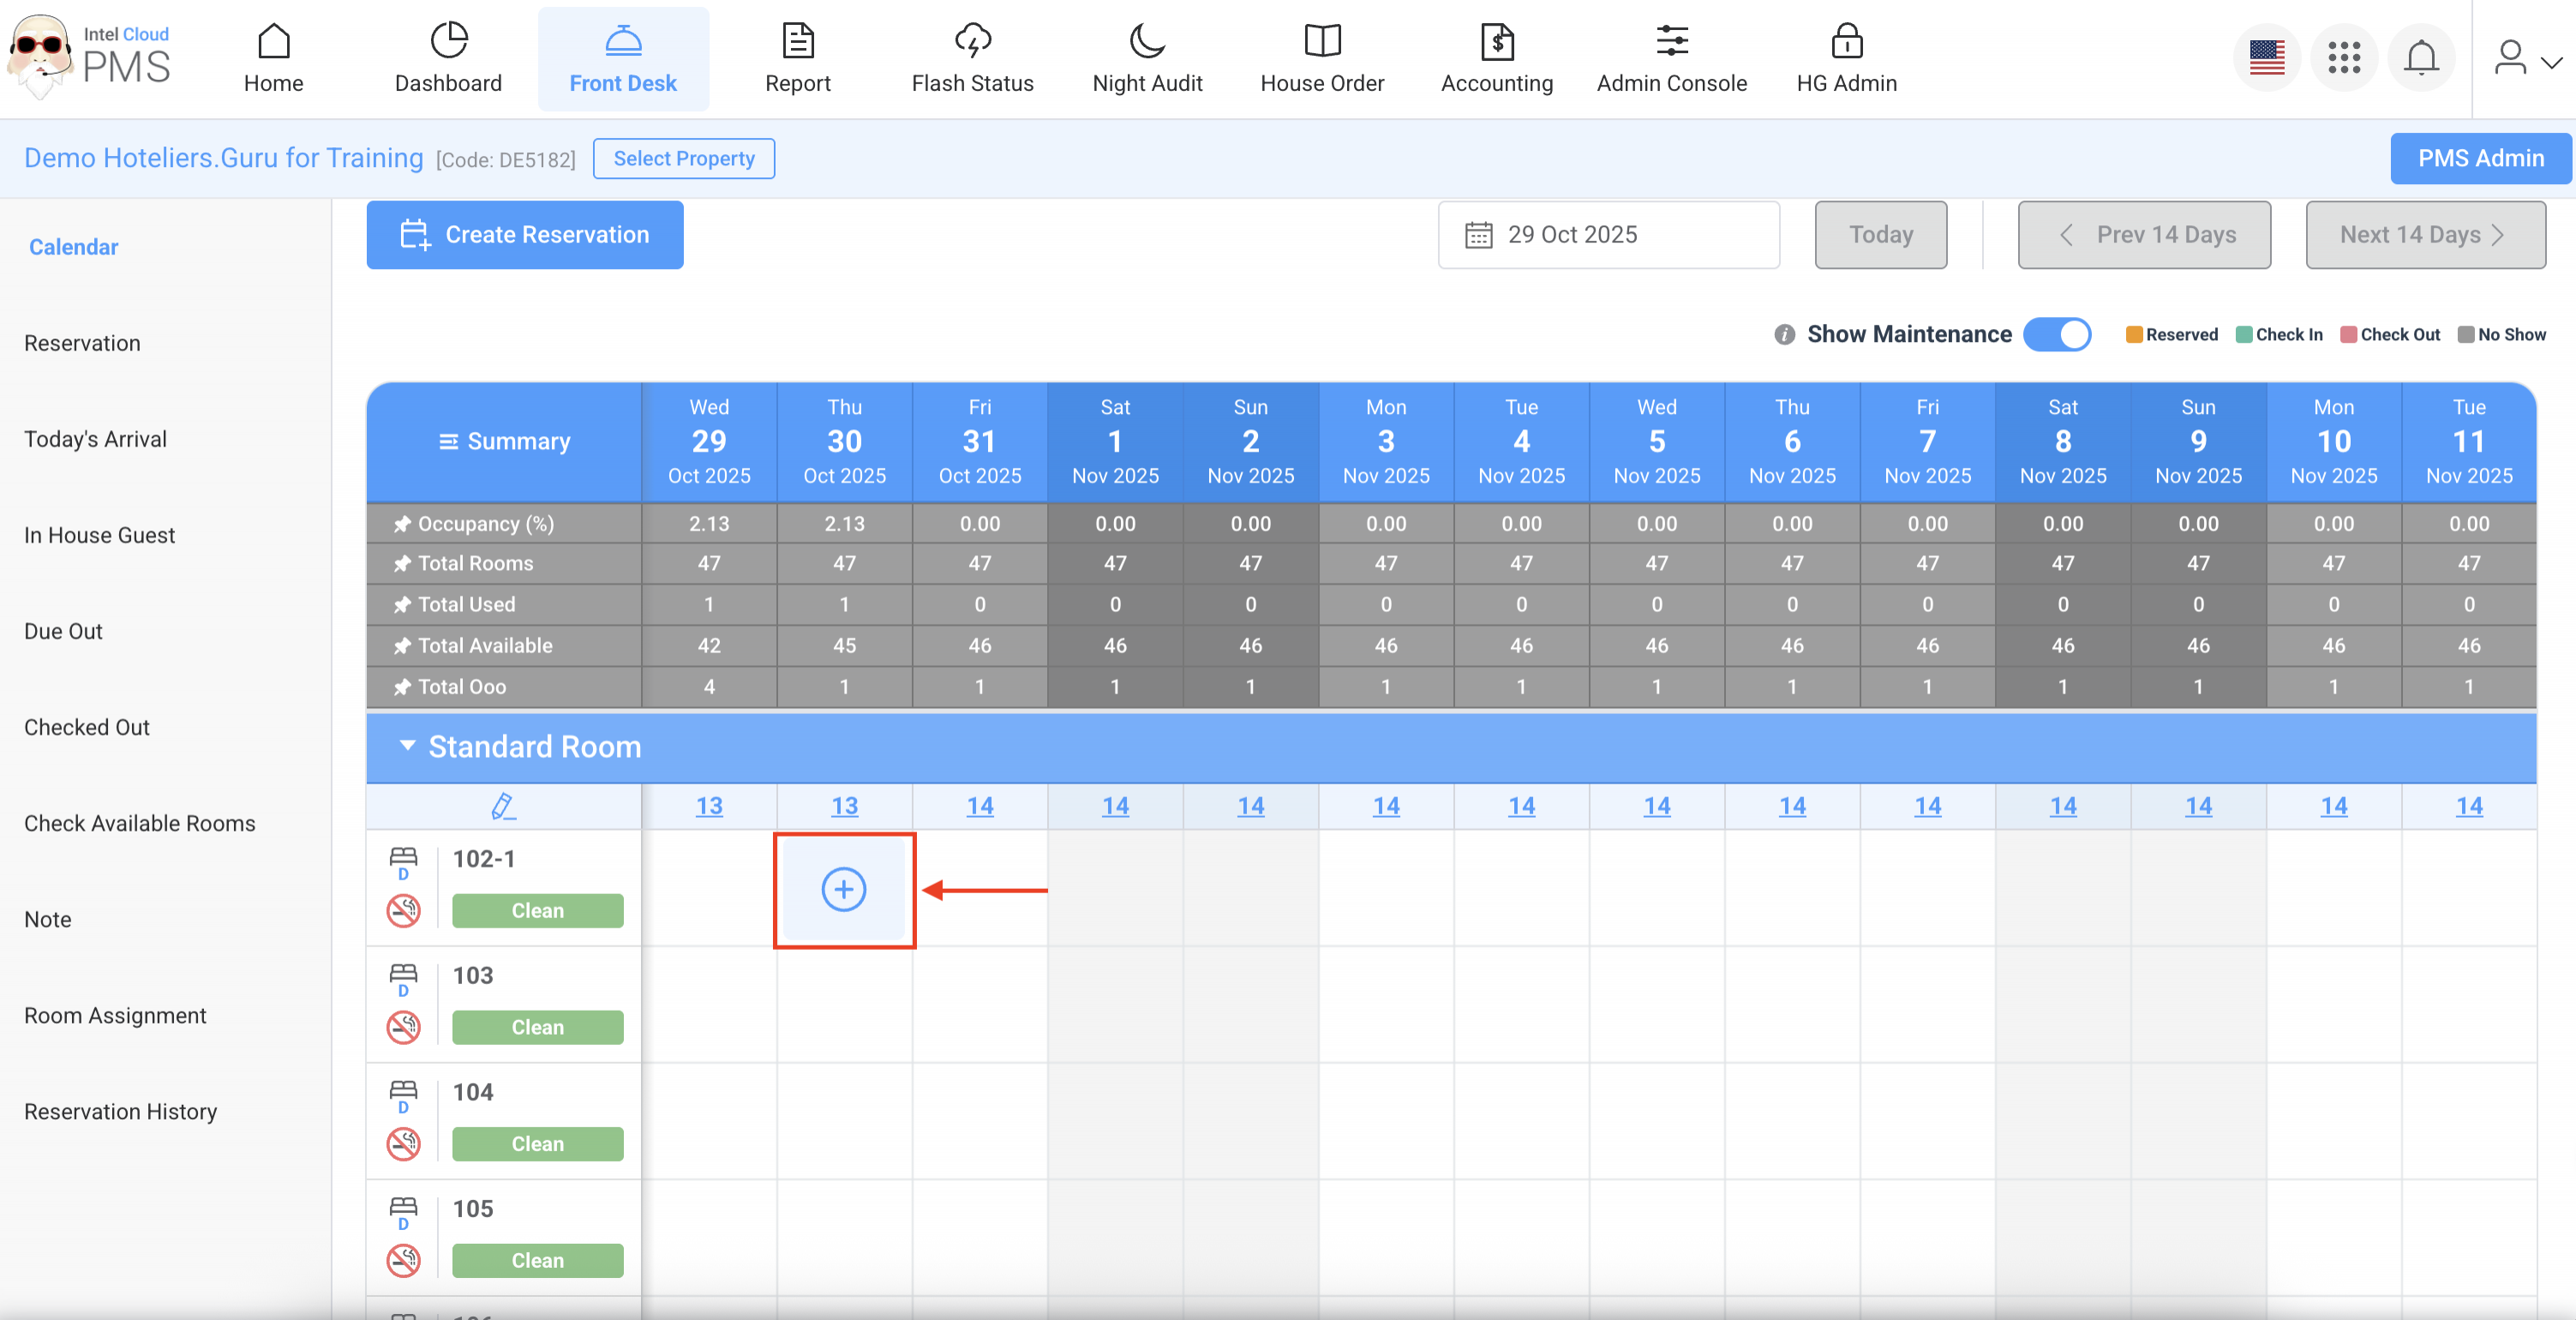
- By selecting available dates on the calendar: Reservations can also be created by selecting the desired dates and room directly from the Calendar view.
Important Note:
You cannot add more guests than the room occupancy allows.
Method 1: By using the Create Reservation button
- Go to Front Desk → click Calendar → click the “Create Reservation” button.
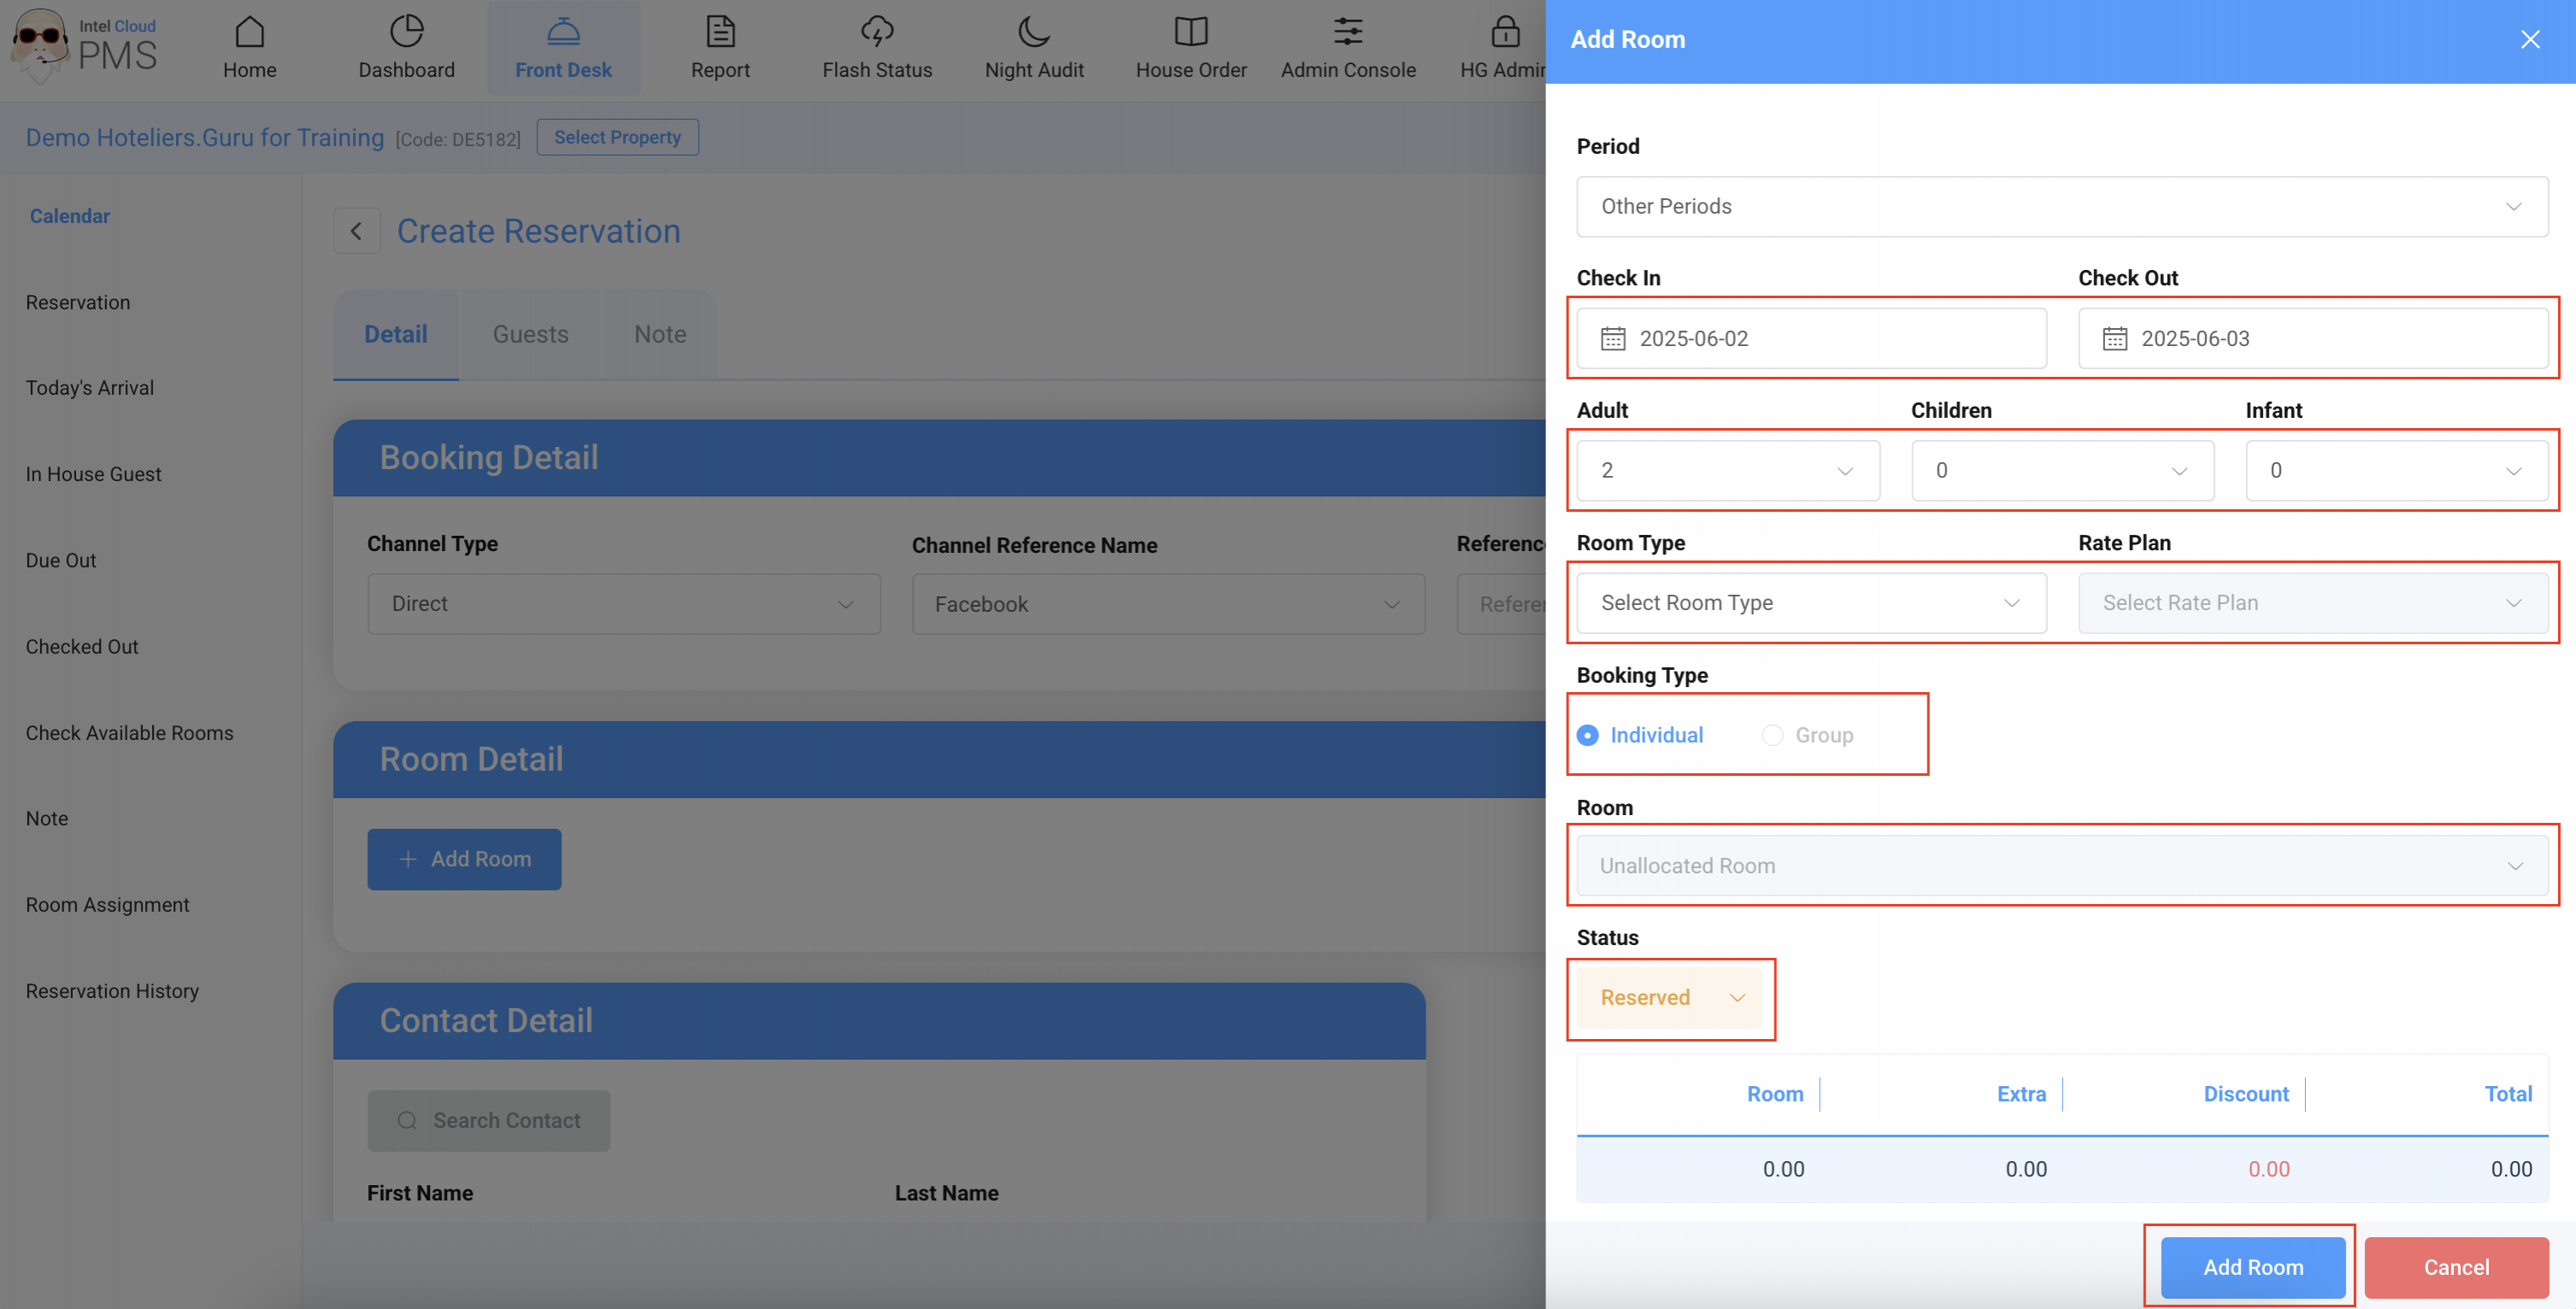
- Check-In, Check-Out: Select the period of stay.
- Adult, Children, Infant: Select the number of guests.
- Room Type: Select the room type.
- Rate Plan: Select the rate plan.
- Booking Type:
- Individual → One room
- Group → Multiple rooms
- Room: Select the room number (Unallocated Room = Room not yet assigned).
- Status: Select the booking status → Reserve
- Click Add Room button → Proceed to the next step.
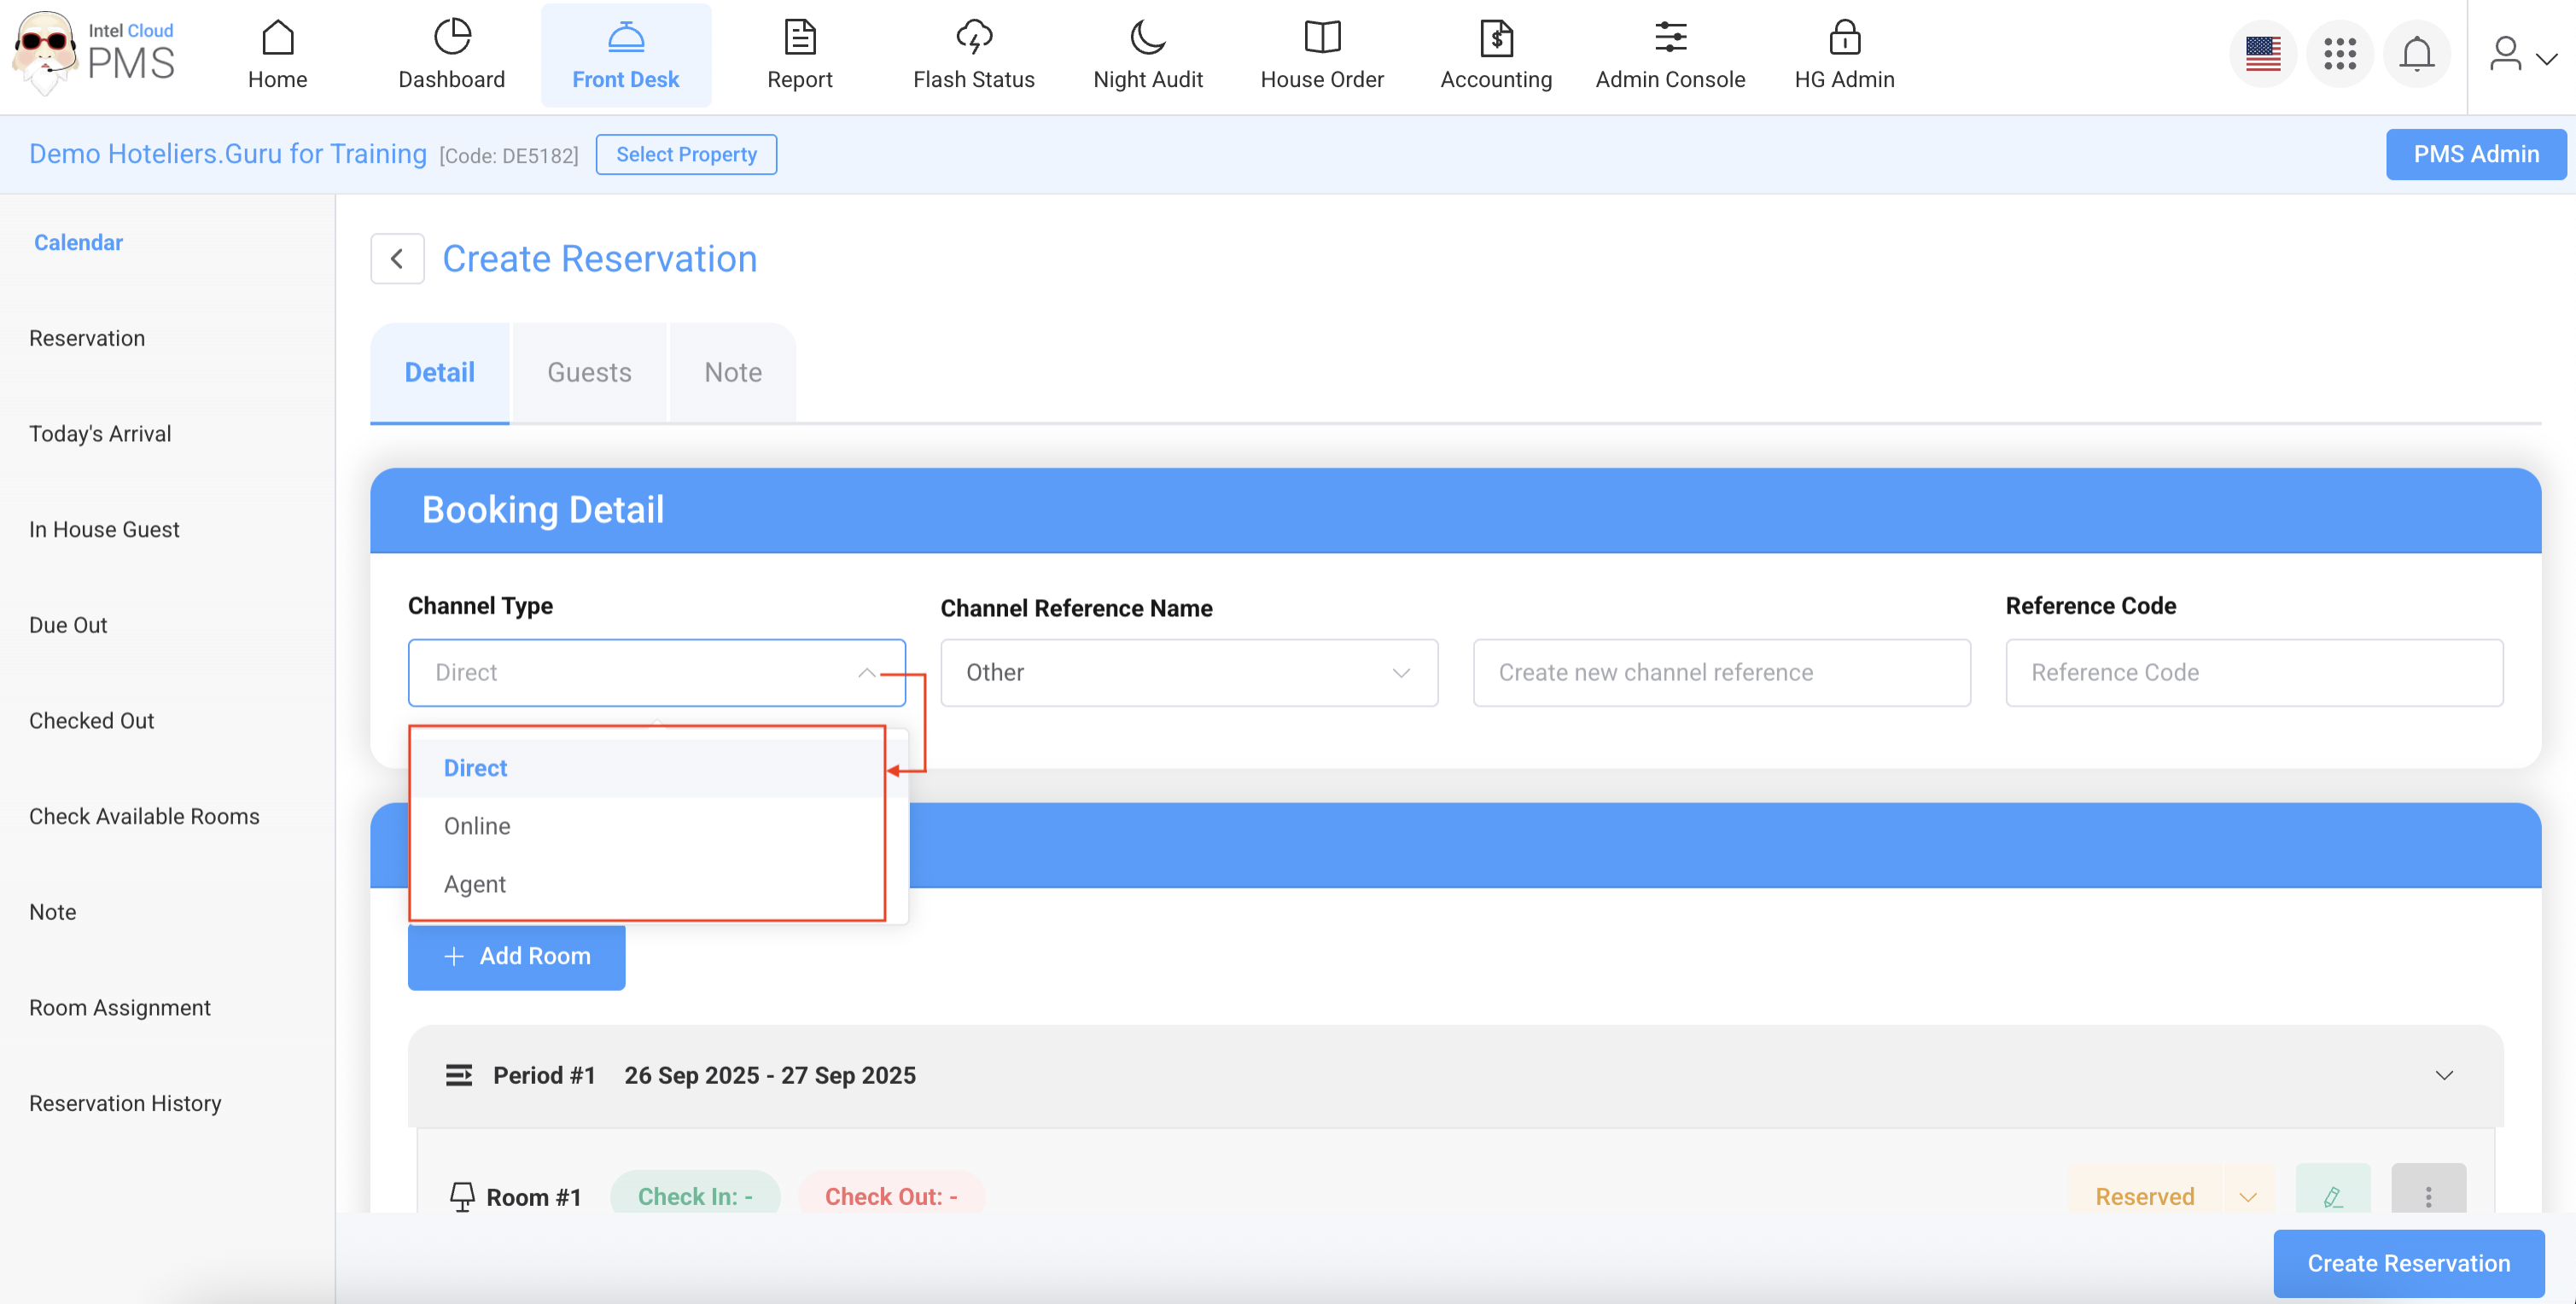
- Booking Detail: Channel Type shows booking information. The booking channel is divided into 3 types:
- Direct: Booked directly with the hotel (e.g., Phone, Email, Walk-in, Line, etc.).
- Online: Booked through Online Travel Agents (OTAs) such as Agoda, Booking.com, Expedia, etc.
- Agent: Booked through offline travel agents such as B2B or local travel companies.
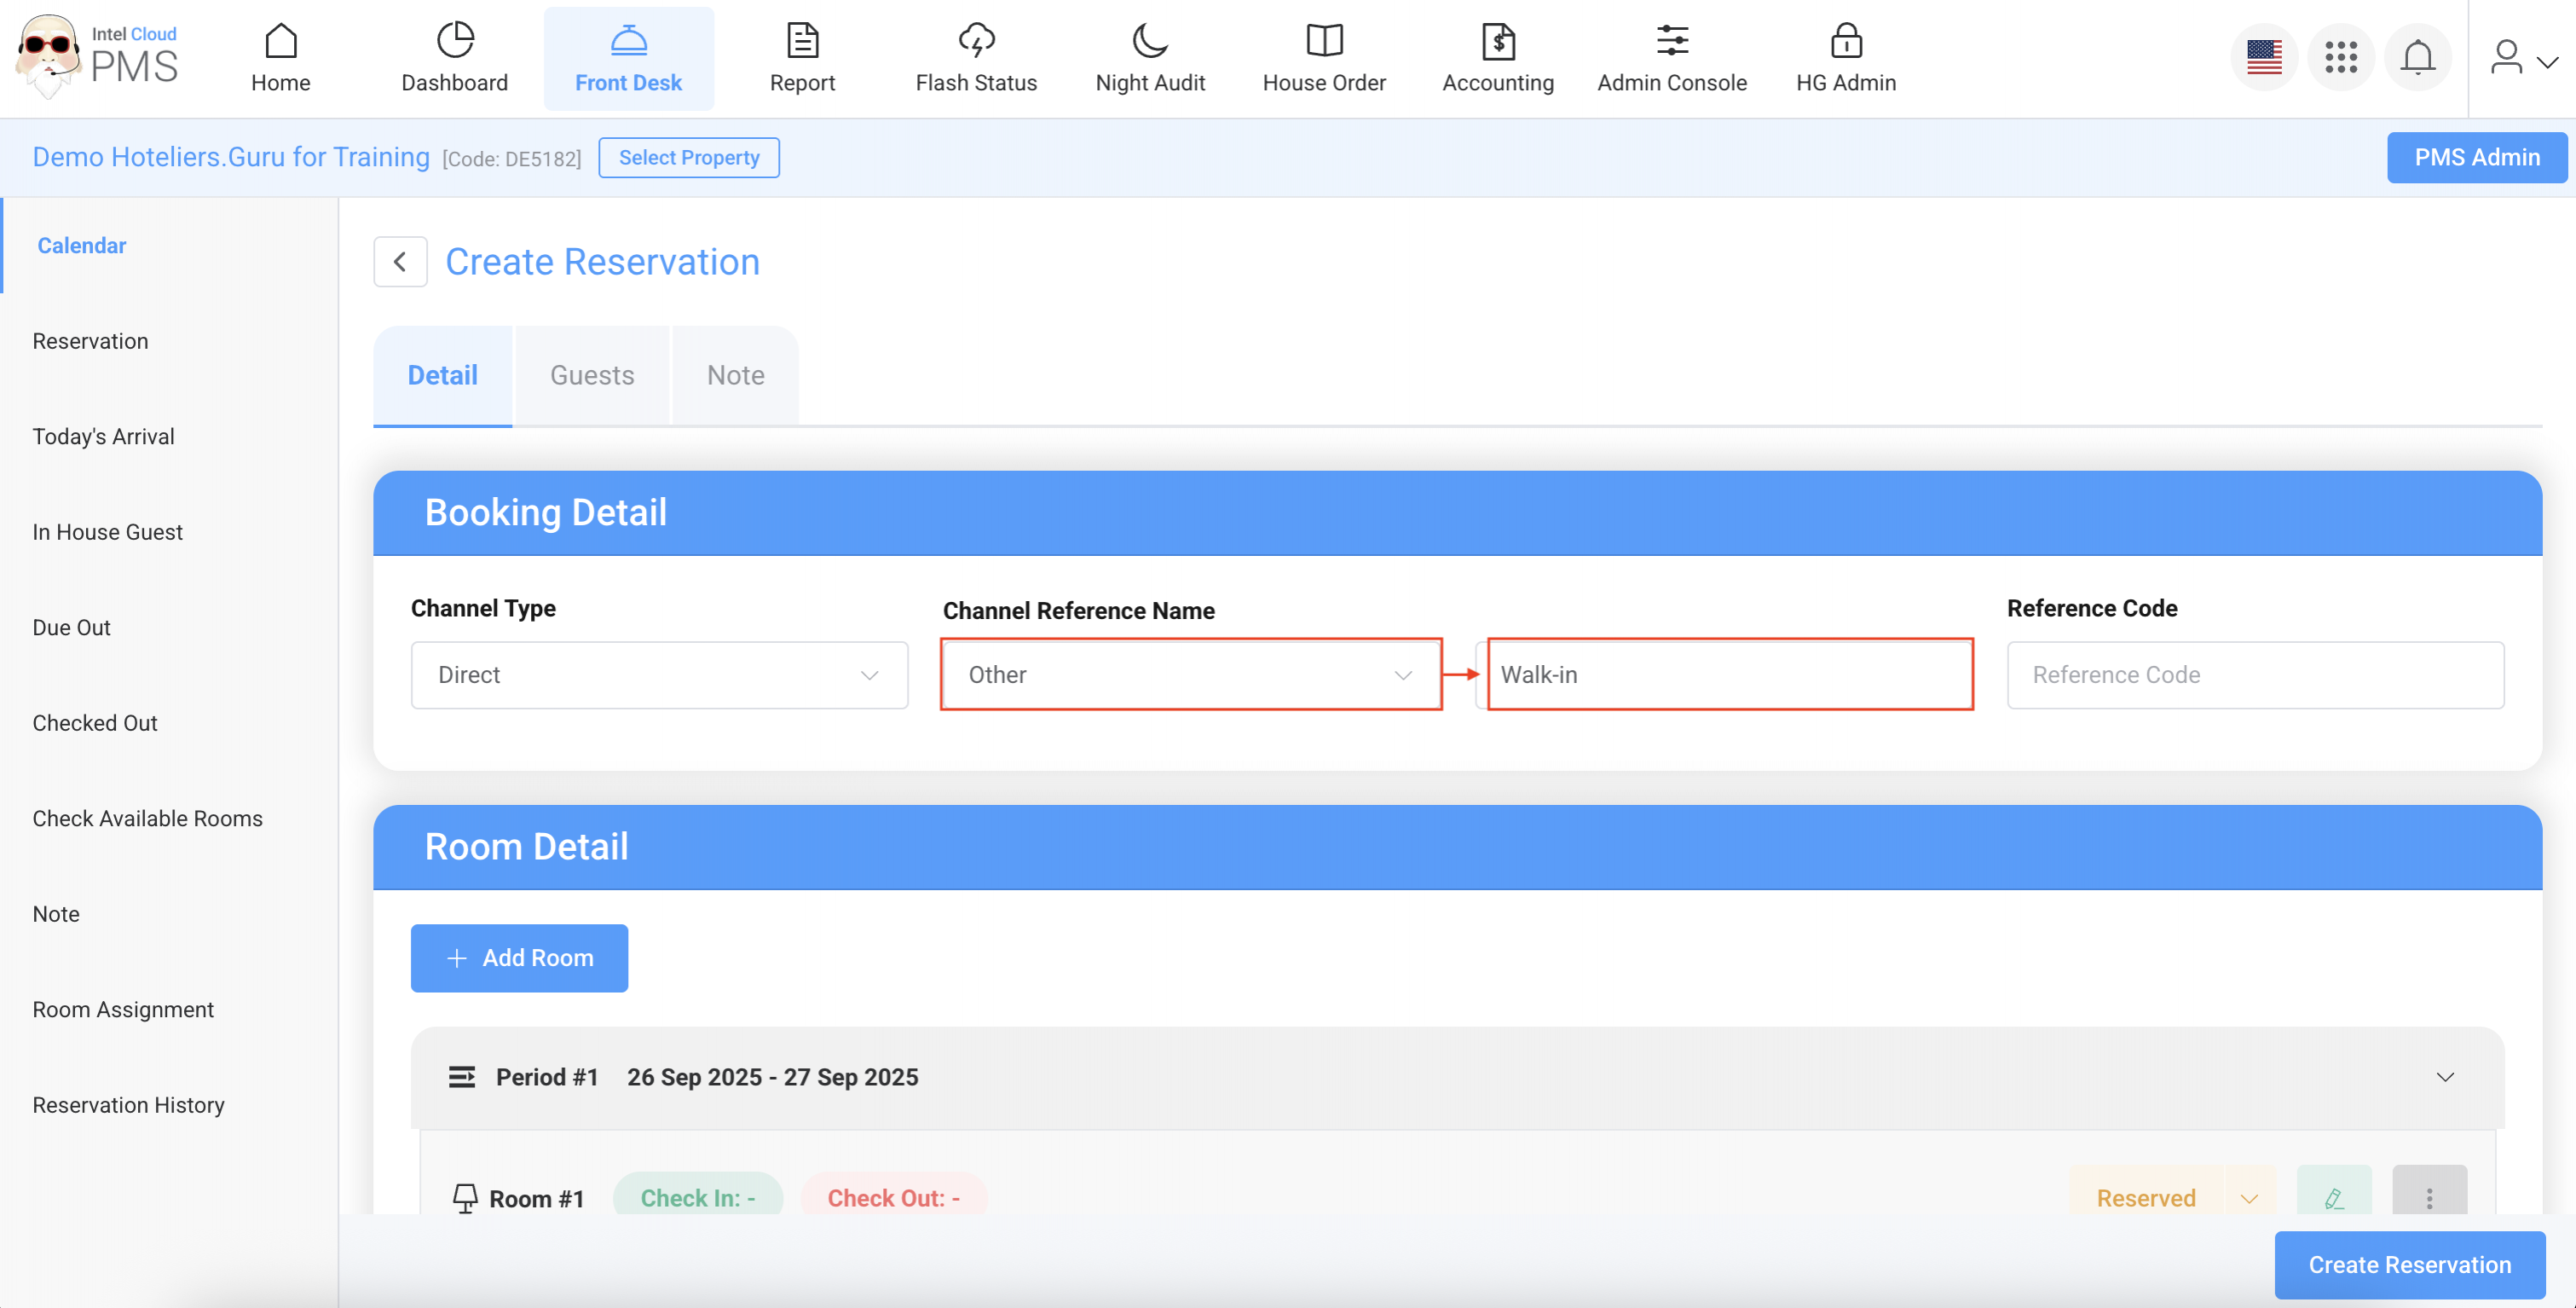
- Channel Reference Name: Used to identify the booking source (must be created by the hotel). You can click drop down list and select Other to create new channel reference name such as Walk-in, Facebook, Phone, Agoda, Booking.com etc.
- Reference Code: Enter the booking number (if any).
- Room Detail: Displays general details of the reservation:
- Add Room button → Add new room
- Edit Period button → Edit period to stay
- Period → Stay dates
- Room → Number of rooms
- Room Type → Room type name
- Rate Plan → Selected rate plan
- Room → Room number
- Guest → Number of guests (Guest Info: customer details)
- Room → Room price
- Extra → Additional paid items
- Discount → Discounted price
- Total → Total price
- Edit Room Price → Adjust room rate
- Apply Standard Rate → Revert to standard rate (from Inventory page) Avoid using unless necessary
- Status → Reserve, Check-In, Check-Out, Cancel, No Show
- Split Room → Split stay into different room numbers (same room type but separate periods)
- Contact Detail → Name of the booking holder (may differ from guest name).
- Guests tap: Displays guest details:
- Note tap:
- Reservation Note: Information displayed on the Calendar page with a red icon (also visible on the Reservation & Confirmation forms).
- Internal Note: Information not displayed on the Calendar page. Internal use for staff only.
- Click Create Reservation button

Method 2: By selecting available dates on the calendar
- Go to Front Desk → click on the desired dates and room directly from the Calendar view.
- Check-In, Check-Out: Select the period of stay.
- Adult, Children, Infant: Select the number of guests.
- Room Type: Select the room type.
- Rate Plan: Select the rate plan.
- Booking Type:
- Individual → One room
- Group → Multiple rooms
- Room: Select the room number (Unallocated Room = Room not yet assigned).
- Status: Select the booking status → Reserve
- Click Add Room button → Proceed to the next step.
- Booking Detail: Channel Type shows booking information. The booking channel is divided into 3 types:
- Direct: Booked directly with the hotel (e.g., Phone, Email, Walk-in, Line, etc.).
- Online: Booked through Online Travel Agents (OTAs) such as Agoda, Booking.com, Expedia, etc.
- Agent: Booked through offline travel agents such as B2B or local travel companies.
- Channel Reference Name: Used to identify the booking source (must be created by the hotel). You can click drop down list and select Other to create new channel reference name such as Walk-in, Facebook, Phone, Agoda, Booking.com etc.
- Reference Code: Enter the booking number (if any).
- Room Detail: Displays general details of the reservation:
- Add Room button → Add new room
- Edit Period button → Edit period to stay
- Period → Stay dates
- Room → Number of rooms
- Room Type → Room type name
- Rate Plan → Selected rate plan
- Room → Room number
- Guest → Number of guests (Guest Info: customer details)
- Room → Room price
- Extra → Additional paid items
- Discount → Discounted price
- Total → Total price
- Edit Room Price → Adjust room rate
- Apply Standard Rate → Revert to standard rate (from Inventory page) Avoid using unless necessary
- Status → Reserve, Check-In, Check-Out, Cancel, No Show
- Split Room → Split stay into different room numbers (same room type but separate periods)
- Contact Detail → Name of the booking holder (may differ from guest name).
- Guests tap: Displays guest details:
- Note tap:
- Reservation Note: Information displayed on the Calendar page with a red icon (also visible on the Reservation & Confirmation forms).
- Internal Note: Information not displayed on the Calendar page. Internal use for staff only.
- Click Create Reservation button